Download from the official site
PR
VPS
Kolay Kurulum: Outline ve XServer VPS ile Güvenli VPN Bağlantıları
Yayınlandı: 2025.06.26
Güncellendi: 2025.06.26
Do you want stronger internet security, but worry the setup will be difficult? Do you want to use Japanese services from overseas, but cannot access them? Have those concerns been on your mind?
That is exactly when a VPN connection becomes useful. If you want an inexpensive and easy way to use a VPN, I recommend the combination of Outline VPN and XServer VPS.
Outline VPN is an open-source VPN tool developed by Google, and its biggest strength is how simple it is to use. By using XServer VPS, yüksek performanslı ve kararlı sunucu ortamlarıyla tanınan büyük bir Japon şirketi olan Xserver Inc. tarafından sağlanan, kendi konforlu ve güvenli VPN ortamınızı kurabilirsiniz.
If you are thinking, "What is Outline VPN?" or "VPS sounds difficult...," do not worry. Once you read this article, you will be able to set up a VPN connection without getting lost and enjoy a safe and secure internet experience.
Getting Started with XServer VPS: Outline VPN for Complete Beginners
What Is Outline VPN? A Simple VPN Explained for Beginners
VPN (Sanal Özel Ağ), internet üzerinde şifreli bir tünel oluşturan ve üçüncü şahısların iletişimlerinizi dinlemesini veya kurcalamasını önleyen bir teknolojidir. Trafiği bir VPN sunucusu üzerinden yönlendirerek gerçek IP adresinizi gizleyebilir ve anonimliği artabilir.
Outline VPN is designed to make this VPN connection process extremely simple.
Outline is a free, easy-to-use application for connecting to a VPN, provided by Jigsaw, part of Google. Even if you have never launched a VPN before, you can start using one in just a few clicks.
It does not require difficult technical knowledge. The goal is to make VPN use as easy as installing an app and pressing a button to finish the connection.
Why Outline VPN and XServer VPS Are Such a Strong Combination
Outline VPN kendi başına basit ve kullanımı kolaydır, ancak onu destekleyen sunucu da bir o kadar önemlidir. İşte bu noktada XServer VPS comes in.
XServer VPS, yurt içi pazar payında 1 numara olan köklü ve yüksek hızlı bir kiralık sunucunun VPS hizmetidir. Uygun fiyatlı 2GB planından yüksek kapasiteli 8GB planlarına kadar her şeyi sunar. Telefon ve e-posta desteği sağladığı için, VPS deneyimi olmayan kişiler bile VPN bağlantıları veya web sitesi oluşturma için bunu rahatlıkla kullanabilir.
Up to 30% off through August 5, 2025, plus a 10-gün free trial
XServer VPS hızlı ve kararlı ağ ortamının yanı sıra güçlü destek sistemiyle de öne çıkıyor. Kendi sunucunuzu yönetmek biraz çaba gerektirir, ancak bunu Outline VPN, you gain the following advantages.
- Reliable domestic location: Sunucu Japonya'da bulunduğundan, güvenle kullanabilirsiniz.
- High security: Because you manage it yourself, you can apply security measures properly.
- Stable communication speed: Because you can use Xserver's high-performance infrastructure, you can expect comfortable connection speeds.
- Maliyet performance: Compared with rental VPN services, it can be more economical over the long term. The longer the contract, the cheaper it becomes.
Kendi VPN sunucunuzu kurmak zor görünebilir, ancak Outline Manager ile sadece birkaç komut girerek kolayca kurabilirsiniz.
Easy to Use: Build Outline VPN on XServer VPS in 6 Steps

Now let me walk you through the actual steps for building Outline VPN on XServer VPS.
Step 1: Prepare XServer VPS - Start Here
If you have not signed up for XServer VPS yet, start by completing the contract.
Preparing XServer VPS
- STEP.1: Create an account on the official XServer websiteGo to XServer VPS. Click Apply now. If you do not already have an account, choose Start now! New application.Enter your email address, name, and other required information to complete registration.
- STEP.2: Apply for a sunucu in your XServer accountChoose the VPS plan that matches your needs. If this is your first time, it is best to start with a relatively affordable plan. The 12-month 2GB plan is a good value at the campaign price.
- STEP.3: Complete the contract procedureSözleşme sürecini tamamlamak için ekrandaki talimatları izleyin.
- ADIM 4: Sunucu işletim sistemini seçinSunucu işletim sistemini seçtiğiniz ekranda, en son kararlı sürümü seçmenizi kesinlikle öneririm: Ubuntu or Debian. Those are the recommended environments for Outline VPN, and setup will go more smoothly.
- STEP.5: Initial setupSözleşme tamamlandıktan sonra Xserver'ın sunucu paneline giriş yapın ve ilk VPS kurulumunu gerçekleştirin. Bu, ana bilgisayar adının (hostname) ve root şifresinin ayarlanmasını içerir. Güçlü bir root şifresi seçtiğinizden emin olun ve unutmamanız için güvenli bir şekilde saklayın.
- STEP.6: Confirm SSH accessVPN sunucusunu yapılandırmak için VPS'e SSH üzerinden bağlanmanız gerekir.
- For Windows: Install an SSH client such as Tera Term, then confirm that you can connect using the VPS IP address, the port number (usually 22), the username (root), and the password.
- For macOS/Linux: Open Terminal and run
ssh root@your-vps-ip-address. On your first connection, you may see a security confirmation message, so type yes. Then enter the root password you set.
Step 2: Install Outline Yöneticisi - Easy Setup
Ardından, VPN sunucusunu yapılandırabilmek ve yönetebilmek için Outline Manager'ı bilgisayarınıza kurun.
Install Outline Yöneticisi
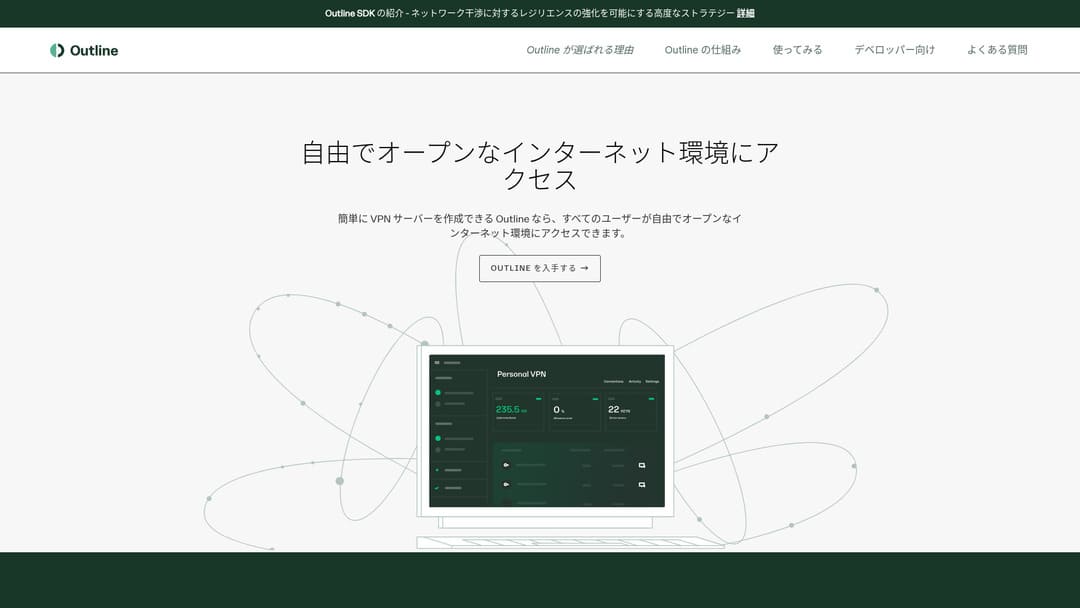
- STEP.1: Go to the official Outline websiteVisit Outline.
- STEP.2: Download Outline YöneticisiGet Outline Manager bölümünden bilgisayarınızın işletim sistemine (Windows, macOS veya Linux) uygun olan Outline Manager sürümünü indirin.
- STEP.3: Install itİndirilen dosyayı çalıştırın ve Outline Manager'ı kurmak için ekrandaki talimatları izleyin.
Adım 3: Outline Manager ile VPS üzerinde bir Outline Sunucusu Kurun
Use Outline Yöneticisi to install an Outline sunucu on XServer VPS.
Outline Manager ile VPS üzerinde bir Outline sunucusu kurun
- STEP.1: Launch Outline YöneticisiAfter installation is complete, launch Outline Yöneticisi.
- STEP.2: Click Set up sunucuİlk kez çalıştırdığınızda sunucu kurulum ekranı görünür. Set up server seçeneğine tıklayın.
- STEP.3: Choose Use your own sunucuSize bir bulut sağlayıcı seçim ekranı gösterilecektir, ancak Set up Outline anywhere seçeneğini belirleyin ve kendi sunucunuzu kullanın.
- STEP.4: Copy the installation commandEkranda Outline sunucusunu VPS'inize kurmak için bir komut görünecektir. Tüm komutu seçin ve kopyalayın.
- STEP.5: Connect to the VPS over SSHPaste the copied installation command into the terminal or command prompt connected over SSH and press Enter to run it.
- STEP.6: Run the command
- Kurulum birkaç dakika sürebilir. Ekrandaki mesajları dikkatlice okuyun ve bitene kadar bekleyin.
- You may be asked a few questions during the process, but in most cases it is fine to press Enter and accept the default choice.
- ADIM 7: Bilgileri Outline Manager'a girinKurulum tamamlandığında, Outline Manager sunucu ayrıntılarını gireceğiniz bir ekran görüntüler.
- Administrator API URL: VPS kurulumu sırasında oluşturulan API URL'si gösterilir. Çoğu durumda Outline Manager'a otomatik olarak yansıtılır, ancak gösterilmiyorsa SSH terminalinde görüntülenen API URL'sini kopyalayıp yapıştırın.
- Server location (optional): Tokyo, Japonya gibi sunucu konumunu girebilirsiniz. Bu yalnızca yönetim amaçlıdır ve bağlantıyı etkilemez.
- ADIM 8: Done with server seçeneğine tıklayınTüm bilgileri girdikten sonra Done with server seçeneğine tıklayın.
Step 4: Create Access Keys and Allow VPN Connections
Outline sunucusu kurulduktan sonra, gerçek VPN bağlantıları için gereken erişim anahtarlarını oluşturun.
Create access keys and allow VPN connections
- ADIM 1: Outline Manager ekranını kontrol edinOutline Manager ekranında, varsayılan bir erişim anahtarı göreceksiniz.
- STEP.2: Add a new access key if neededIf you want to create a new access key, click the Add new key button.
- STEP.3: Rename the access key if you wantYou can rename the access key you created to match the device or user that will connect. Select the key, click Edit name, and change it.
- STEP.4: Share the access keyThe access key you create is required when you connect with the Outline client. When you select the access key, a button labeled Share invite appears. Click it to copy the access-key URL, then share that URL with the device you want to connect.
Step 5: Install the Outline Client - Works on Any Device
Install the Outline client on the device that will connect to the VPN, such as a PC, smartphone, or tablet.
Install the Outline client
- STEP.1: Go to the official Outline websiteVisit Outline.
- STEP.2: Download the Outline clientGet Outline Client bölümünden, cihazınızın işletim sistemine uygun Outline istemcisini indirin ve kurun.
- PC (Windows, macOS, Linux): Run the downloaded file to install it.
- Smartphone / tablet (Android, iOS): Search for Outline in the App Store or Google Play Store and install it.
Step 6: Connect to Outline VPN with the Issued Access Key
Once the Outline client is installed, it is time to connect to the VPN.
Connect to Outline VPN with the issued access key
- STEP.1: Launch the Outline clientLaunch the Outline client you installed.
- STEP.2: Add the access key
- For PC: Add server veya benzeri bir düğmeye tıklayın, Adım 4'te kopyaladığınız erişim anahtarı URL'sini yapıştırın ve Add server seçeneğine tıklayın.
- For smartphone / tablet: When you launch the app, it may ask you for an access key. Copy and paste the access-key URL shared in Step 4. If a QR code is shown, you can also scan it.
- STEP.3: ConnectSunucu eklendikten sonra bir bağlan düğmesi görünür. VPN bağlantısını başlatmak için bu düğmeye tıklayın.
- STEP.4: Confirm the connectionBağlantı başarılı olduğunda, Outline istemcisi Connected gösterir ve ekranın üst kısmındaki durum çubuğunda veya benzeri bir konumda bir VPN simgesi belirir.
With that, your VPN connection using Outline VPN and XServer VPS tamamlandı. İnternet trafiğiniz şifrelenerek daha güvenli hale gelir ve seçtiğiniz sunucu konumu üzerinden yönlendirilir.
Benefits and Use Cases of Outline VPN and XServer VPS

How Fast Is It? How Stable Is It? A Full Look at the Benefits of Outline VPN
Outline VPN is based on the Shadowsocks protocol, so you can expect communication that is relatively lightweight and fast.
By using the high-performance infrastructure of XServer VPS, you can achieve an even more stable communication environment. Still, you should understand that VPN speed can vary depending on physical distance and network congestion.
Access Safely from Anywhere: Use Cases for Outline VPN
- Security on public Wi-Fi: Public Wi-Fi in places such as cafes and hotels can be weak on security. By using a VPN connection, you encrypt your communications and prevent third parties from eavesdropping on them.
- Bypassing access restrictions from overseas: If you want to access services or content that are available only in Japan while you are abroad, routing your connection through a VPN sunucu in Japan may make that possible.
- Privacy protection: Trafiği bir VPN sunucusu üzerinden yönlendirerek gerçek IP adresinizi gizleyebilir ve make it harder for websites and advertising trackers to follow you.
- Bypassing censorship: In some countries and regions, internet censorship may be in place. Using a VPN may help you get around those restrictions.
Comfortable Access from Overseas Too: Bypass Regional Restrictions
By using Outline VPN and XServer VPS, kendi seçeceğiniz bir konumda bir VPN sunucusu kurabilirsiniz. Örneğin, yurt dışından Japonya'daki hizmetleri kullanmak istiyorsanız, trafiğinizi Japonya'daki bir VPS sunucusu üzerinden yönlendirerek hizmete Japonya içinden erişiyormuş gibi görünebilirsiniz.
As a result, you may be able to use content that had been unavailable because of regional restrictions.
Tips for Using Outline VPN More Comfortably

How to Use It on Multiple Devices - Share with Family or a Team
The access key you create can be shared and used on multiple devices.
Outline Manager'da yeni bir erişim anahtarı oluşturup bunu başka bir cihazdaki Outline istemcisine ekleyerek, VPN bağlantısını birden fazla cihazda kolayca kullanabilirsiniz. Bu, bir VPN'i aile üyeleriyle veya küçük bir ekiple paylaşmak istediğinizde kullanışlıdır.
Check and Manage Data Usage - Prevent Overuse
In Outline Yöneticisi, you can check the data usage for each access key.
This lets you see who is using how much data, and you can also set data limits if needed. By setting limits, you can prevent unintended overuse of bandwidth.
Recommended Ayarlar to Improve Security Even Further
- VPS security measures: Review the firewall settings on XServer VPS ve gereksiz bağlantı noktalarını (portları) kapatın. İşletim sistemini ve yazılımları tamamen güncel tutmak da önemlidir.
- Strong passwords: VPS root hesabı ve Outline Manager erişim anahtarları için güçlü, tahmin edilmesi zor şifreler belirleyin.
- Two-factor authentication: Enable two-factor authentication for your Xserver account and VPS login wherever possible.
Summary: Enjoy a Safe and Comfortable VPN Experience with Outline and XServer VPS

Outline VPN, basit arayüzünün aksine oldukça güçlü bir VPN işlevselliği sunar. Outline Manager zor kurulum işlemlerini otomatik olarak hallettiği için yeni başlayanlar bile güvenle bir VPN ortamı kurabilir ve kullanabilir.
When you combine it with XServer VPS, the flexibility of Outline VPN daha da artar. VPN sunucunuzu istediğiniz yere yerleştirebilir ve kararlı, yüksek hızlı iletişimin keyfini çıkarabilirsiniz.
Use this article as your guide, and try building a safe and comfortable internet environment of your own with Outline VPN and XServer VPS.