10-gün ücretsiz trial
PR
VPS
Fast at Over 130Mbps: Building Outline VPN on ABLENET VPS
Yayınlandı: 2025.06.26
Güncellendi: 2025.06.26
People who want to browse the internet through a VPN are becoming more common.
Using a VPN (Virtual Private Network) improves security and also lets you access Japan-only services and content from overseas.
That said, you naturally worry about the speed and safety of a VPN connection.
Güvenli ve hızlı bir VPN bağlantısı elde etmenin en iyi yolu kendi VPN ortamınızı kurmaktır. Bunu yapmak için VPN için bir sunucu ortamına ihtiyacınız vardır. Bu sefer, ABLENET VPS and Outline VPN.
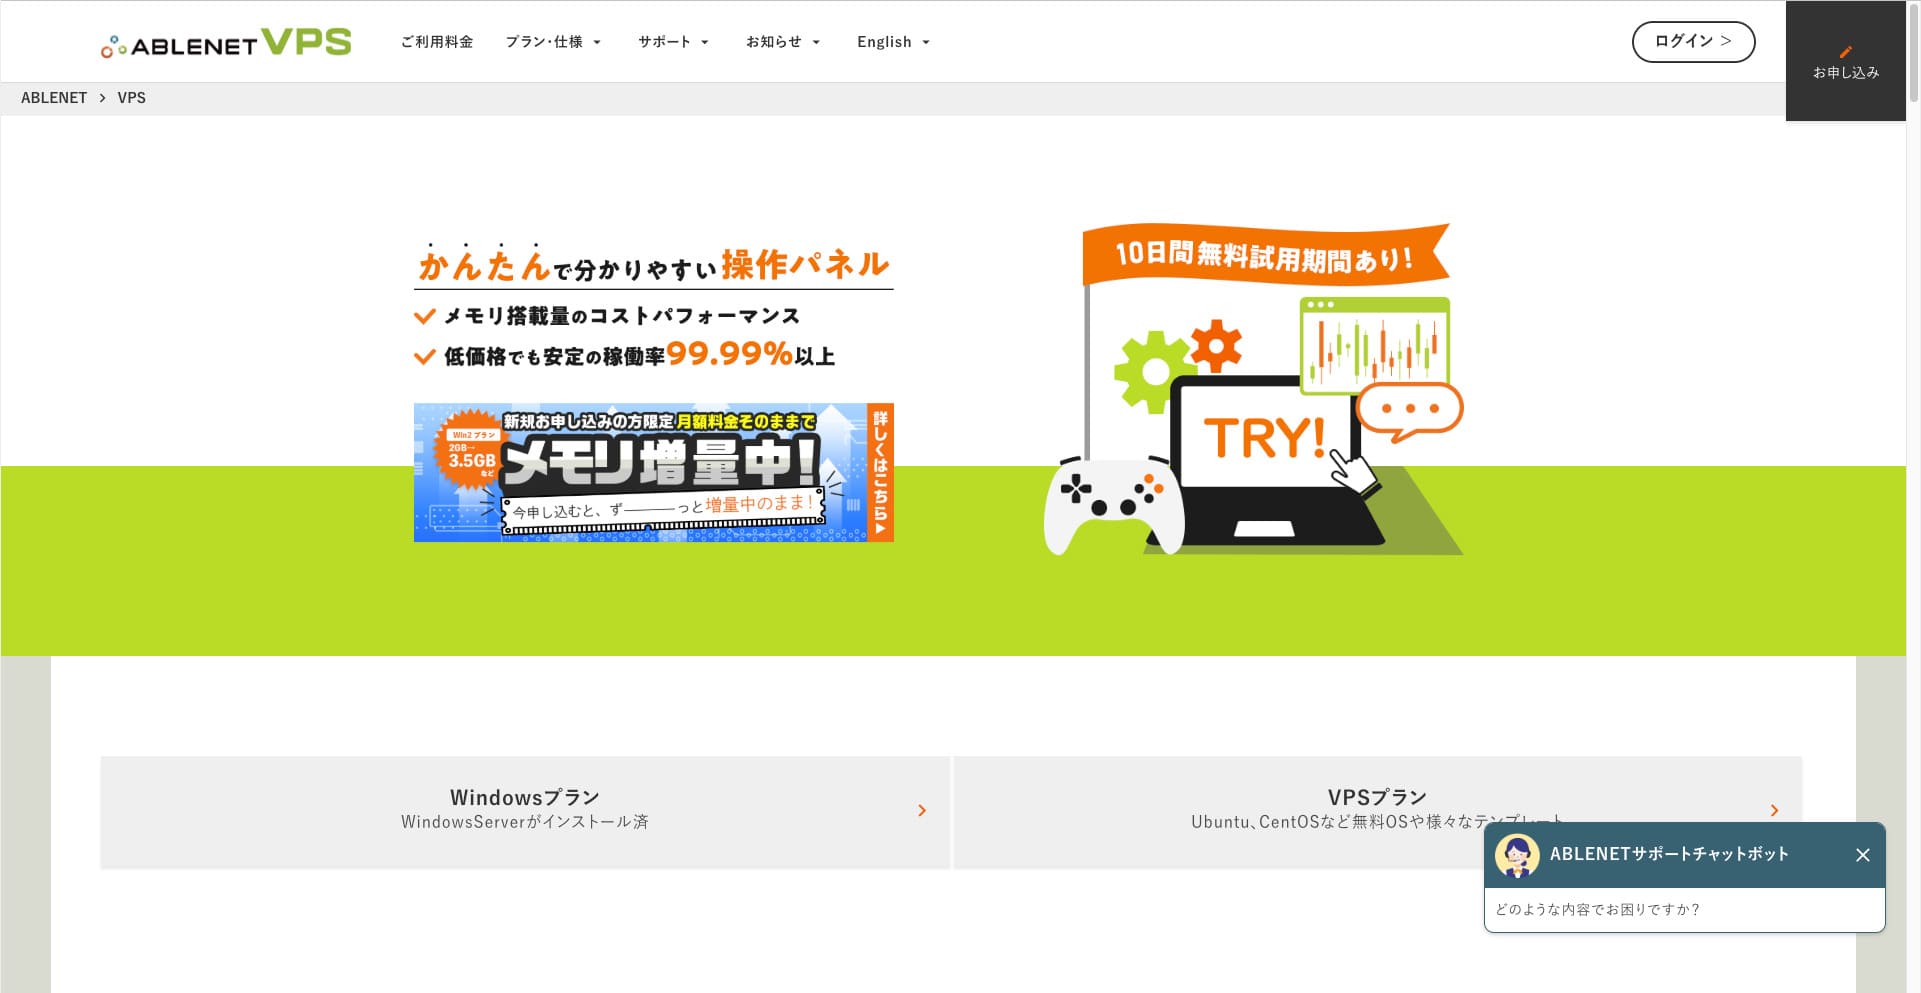
Why I Recommend ABLENET VPS
The biggest reason I chose ABLENET VPS is its stability.
- Operating history: 25 yılı aşkın faaliyet süresiyle Japonya'nın en köklü sunucu şirketlerinden biridir. VPS hizmeti de 2011'den beri mevcuttur.
- Uptime: An uptime of over 99.99% gives you clear, measurable peace of mind.
- Traffic allowance: It also offers unlimited data transfer, making it ideal for use as a VPN.
Japonya'da Xserver ve Sakura Internet de VPS hizmetleri sunmaktadır, ancak ABLENET de bir o kadar güvenilirdir. Sınırsız veri aktarımı artık birçok sunucu şirketinde standart olabilir, ancak ABLENET öncülerden biriydi.
Hikaru Ono
Bu bilgi geçmişte resmî sitede görünmüştü, ancak ABLENET üzerinde tek bir ayda 25TB kullanan bir ileri düzey kullanıcı bile varmış gibi görünüyor. Gerçekten de the data transfer really was unlimited.
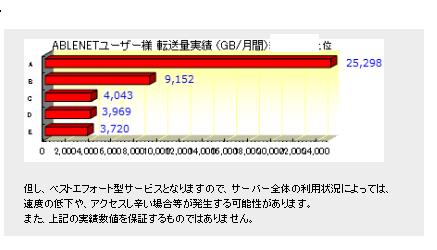
So if you expect heavy data usage for things like watching movies and video content or doing programming work, I recommend building your VPN on ABLENET VPS.
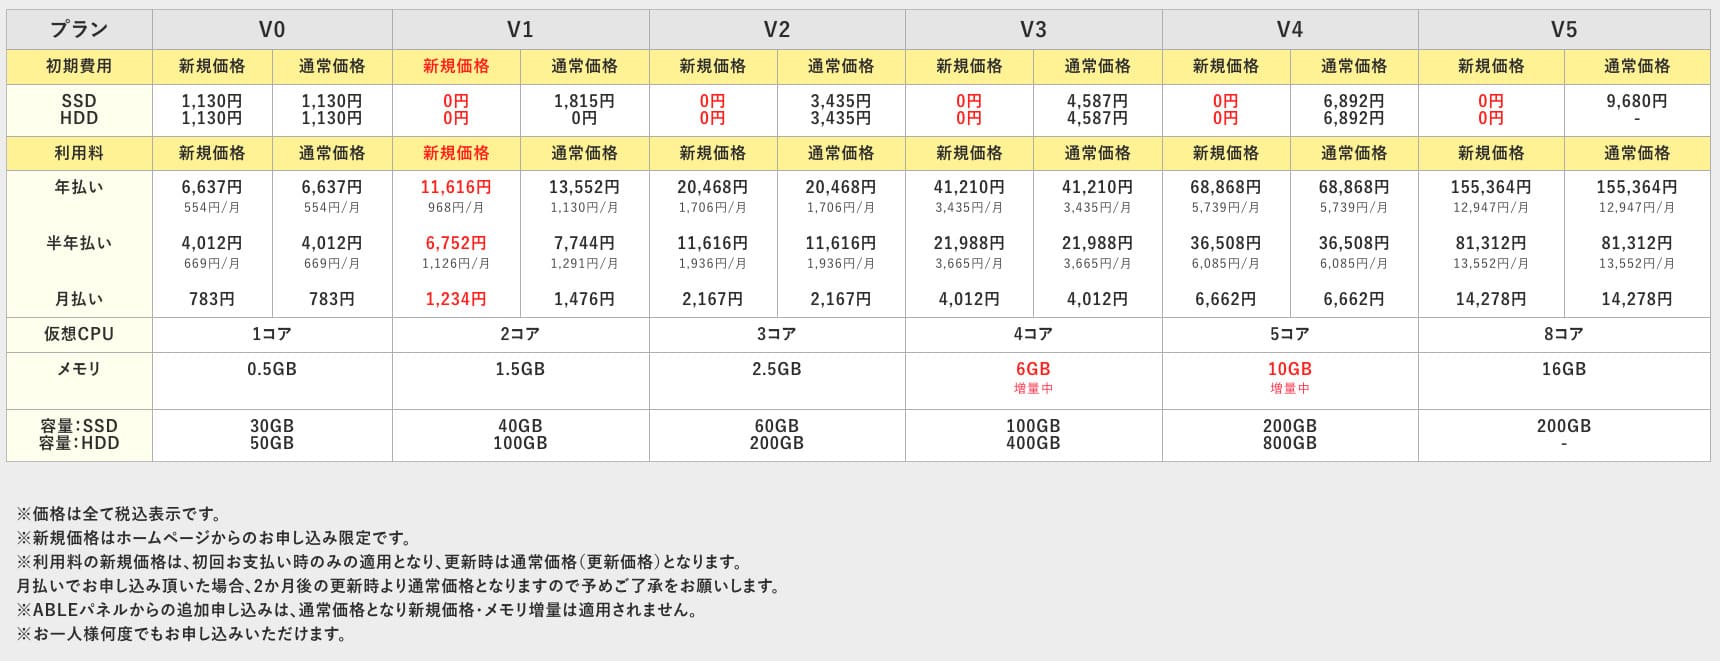
ABLENET VPS is a stable VPS with 99.99% uptime, even though it is affordably priced. It offers a wide range of plans, from the accessible V0 plan with 0.5GB of memory to the high-spec V5 plan with 16GB of memory, so you can find the right option for your needs.
What Is Outline VPN? A Basit VPN Setup Even Beginners Can Understand
VPN (Virtual Private Network) is a technokayıty that creates an encrypted tunnel across the internet and prevents eavesdropping and tampering by third parties. Trafiğinizi bir VPN sunucusu üzerinden yönlendirerek gerçek IP adresinizi gizleyebilir ve anonimliğinizi artırabilirsiniz.
Outline VPN is designed to make this kind of VPN connection extremely basit.
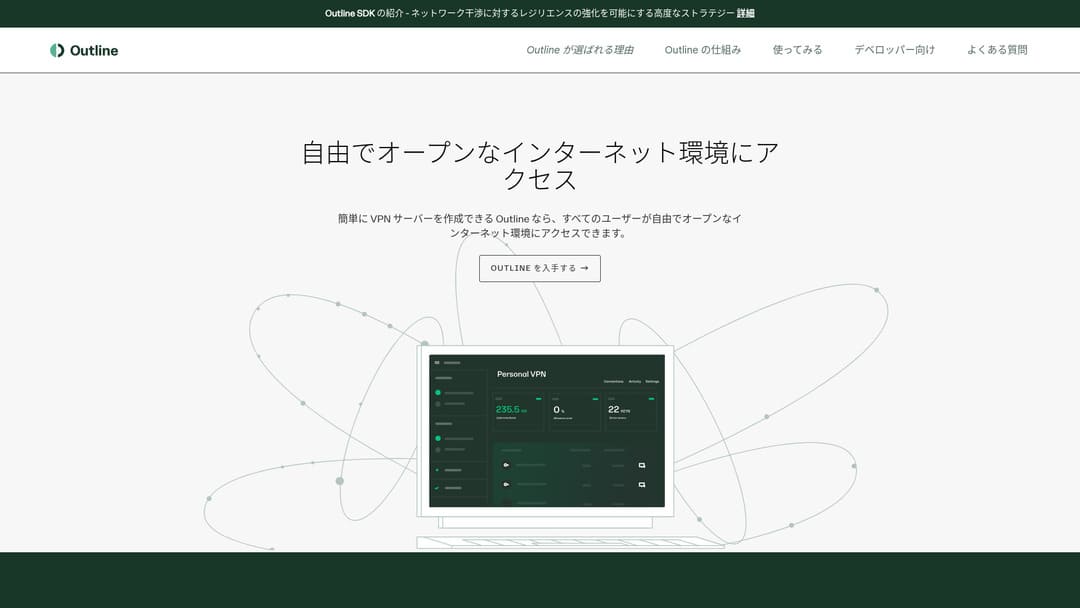
"Outline", Google bünyesindeki Jigsaw firması tarafından sunulan ve VPN üzerinden bağlanmanıza olanak tanıyan ücretsiz ve kolay bir uygulamadır. Daha önce hiç VPN kurmamış olsanız bile sadece birkaç tıklamayla başlayabilirsiniz.
Resmî siteden indirin
Hikaru Ono
This time, I am using Outline VPN so that anyone can build a VPN easily.
Build Outline VPN on ABLENET VPS in 6 Easy Steps
Now, let me walk you through the actual process of building Outline VPN on ABLENET VPS in detail.
Step 1: Get Started with ABLENET VPS
If you have not yet signed up for ABLENET VPS, take care of that first.
Get Started with ABLENET VPS
- STEP.1Choose a plan on ABLENET VPS
Go to ABLENET VPS and click "Apply."
You can choose either a Windows plan or a VPS plan. For this VPN setup, use the VPS plan. I recommend the V1 plan with no initial fee and fast SSD storage.
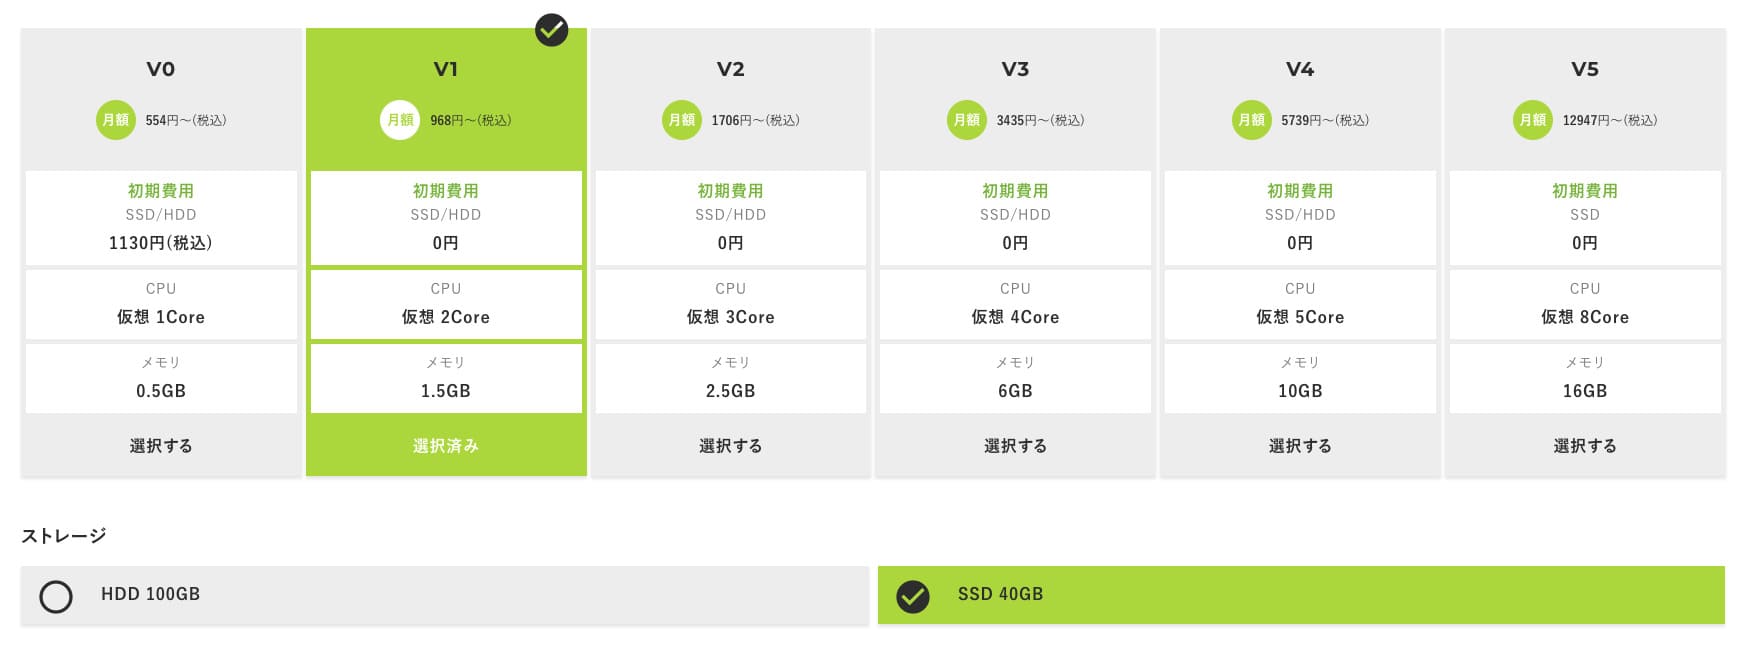
Start with the V1 plan, and if it feels underspecified later, upgrade to V2 or V3. After your service begins, you can request a spec upgrade from the ABLE panel.
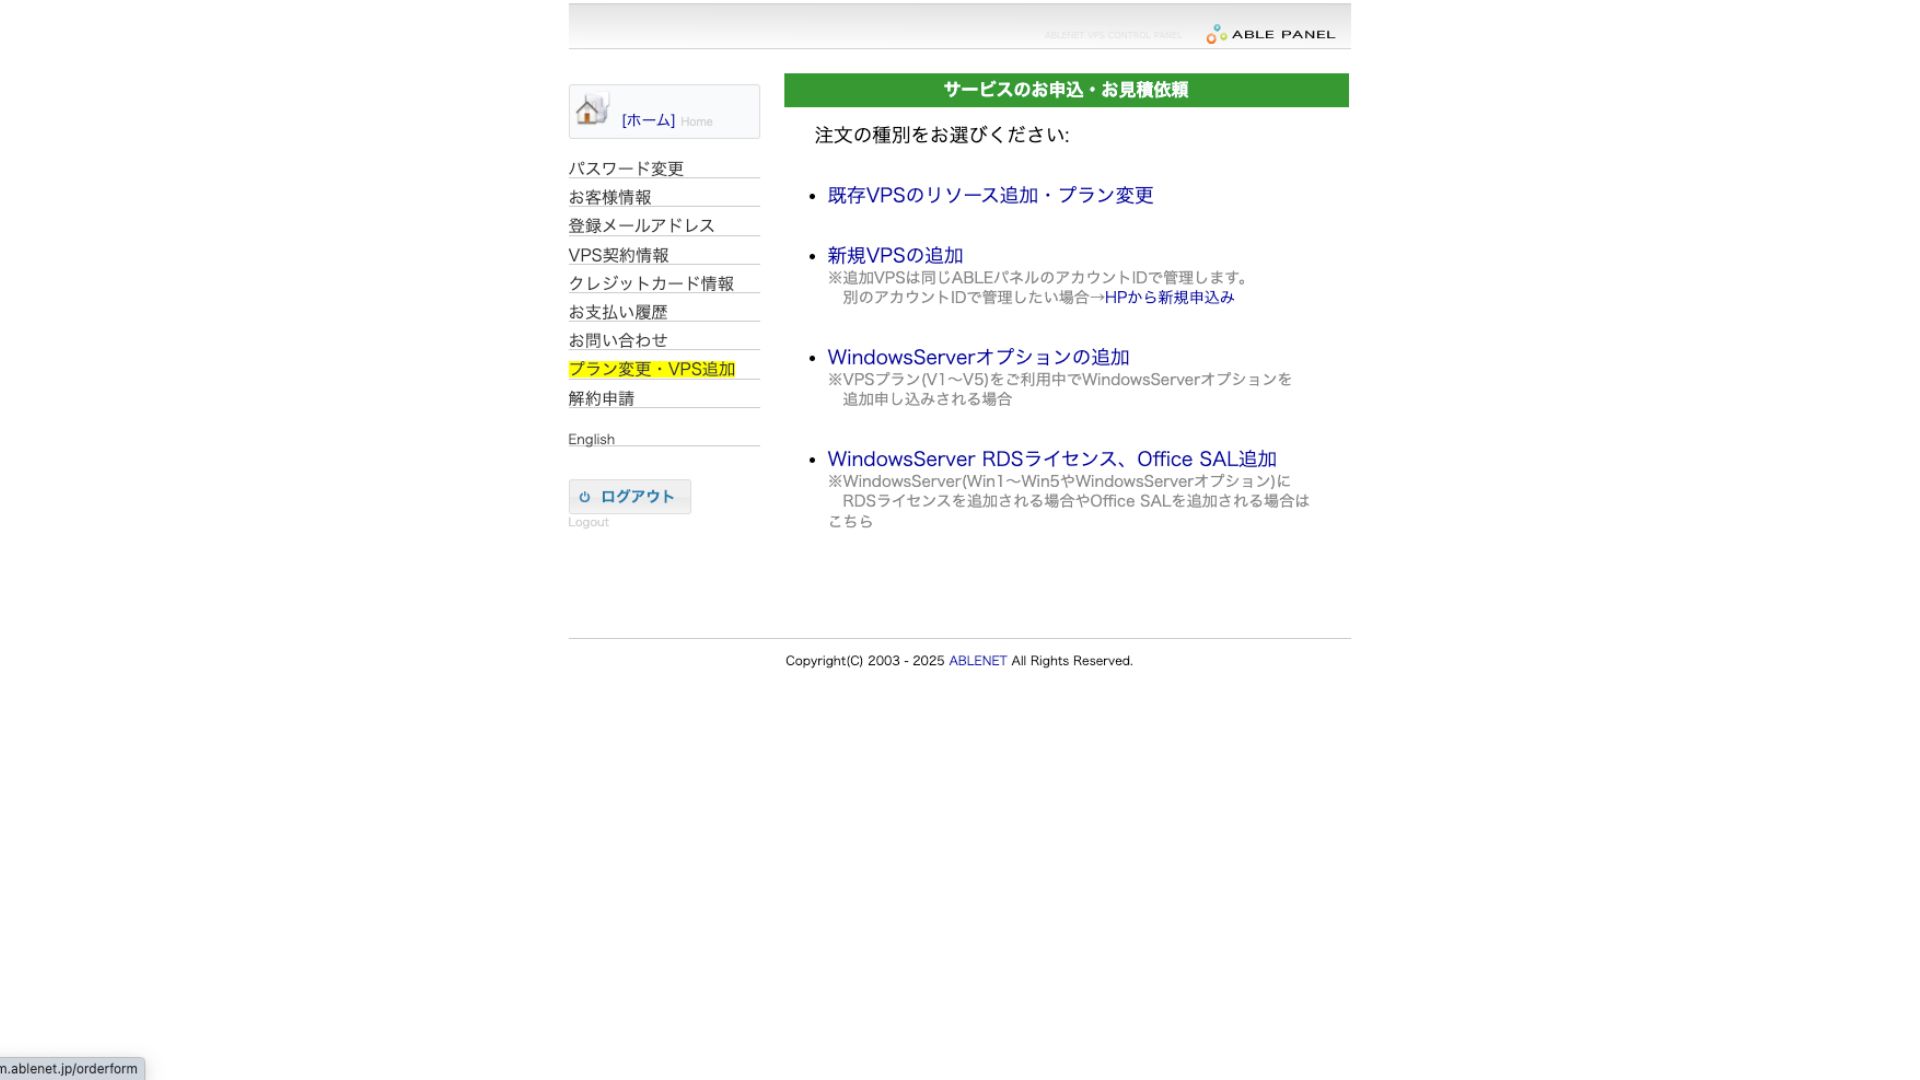
For the payment method, using the credit-card trial period is fine.

Review the terms of use and check the box.
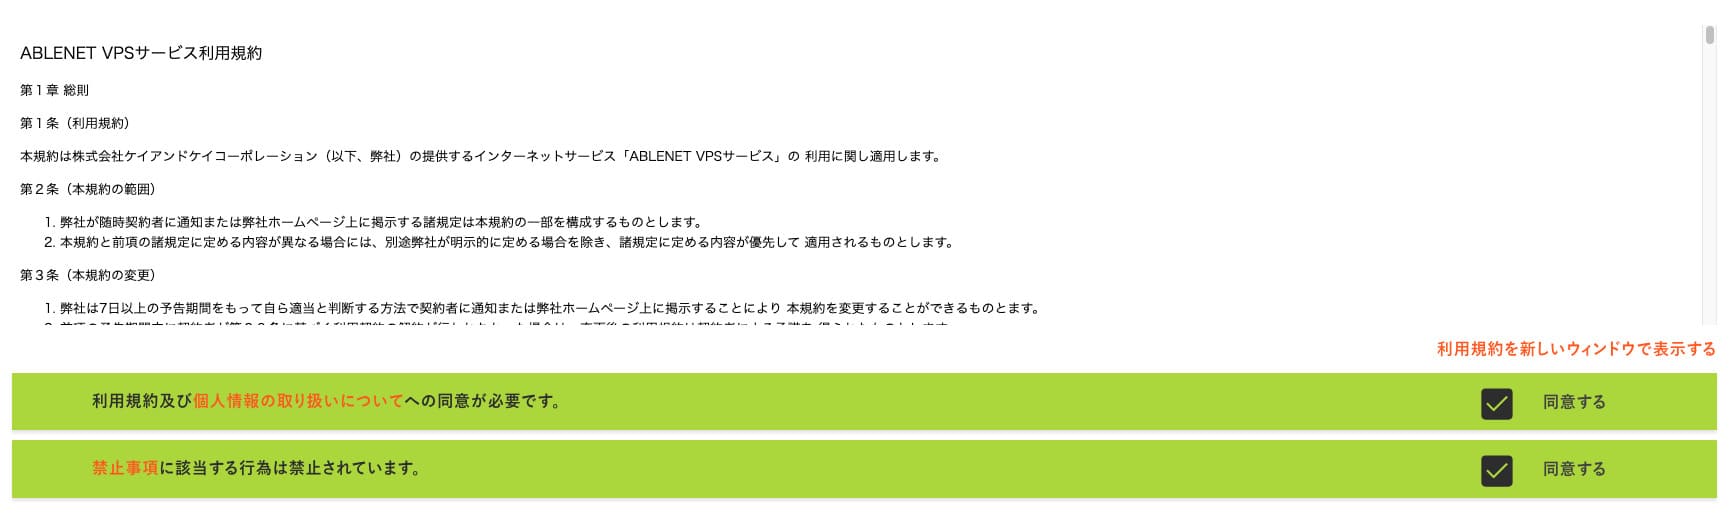
Click "Proceed to select the contract term."
- STEP.2Select the contract term
Sunucu süresi için yıllık sözleşme daha avantajlıdır. Bu sefer VPS planını kullandığımız için herhangi bir seçeneğe gerek yoktur.
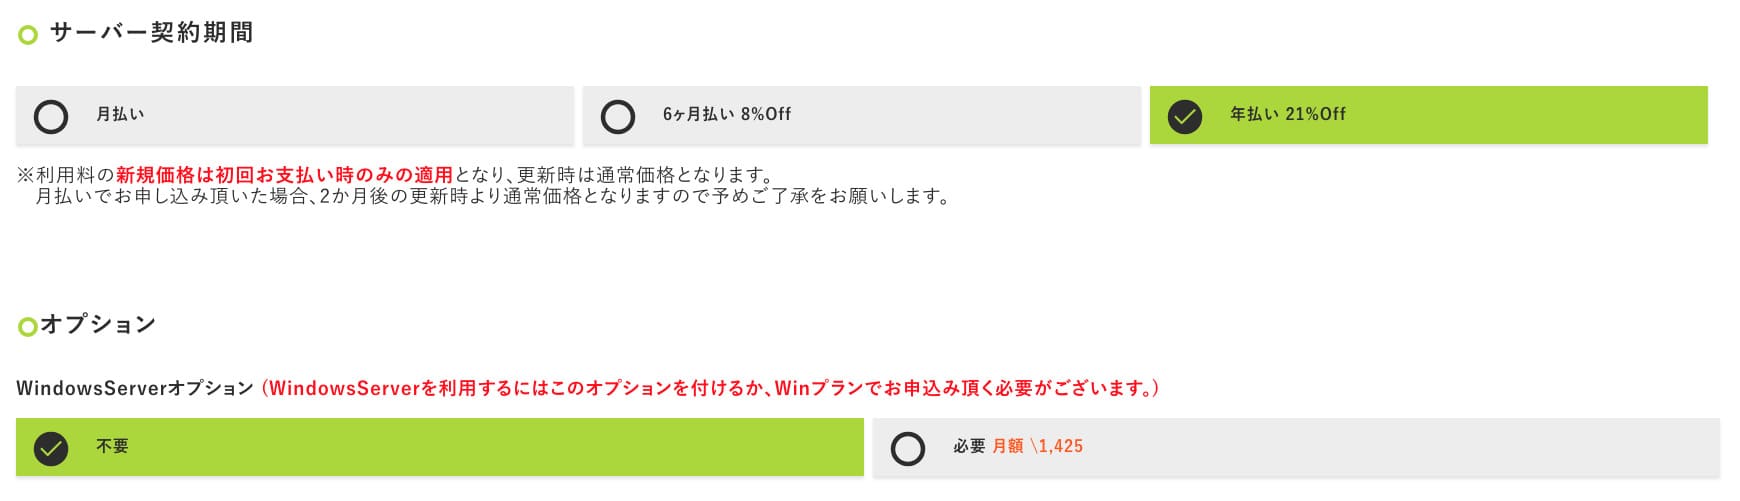
Doldurduktan sonra "Proceed to the estimate screen" seçeneğine tıklayın. Tahmini maliyeti inceleyin ve her şey yolunda görünüyorsa "Proceed to enter applicant information" seçeneğine tıklayın.
- STEP.3Enter applicant information
Adınızı, adresinizi ve diğer başvuru sahibi ayrıntılarını girin. Sipariş inceleme ekranına devam edin ve başvuruyu gönderin.
- STEP.4Enter payment information
If you are paying by credit card, enter the cardholder information and other required details. If everything is correct, click "Confirm order" to submit.
Once you receive the email with your VPS information, the application is complete.
Step 2: Install Outline Yöneticisi - Basit Setup
Ardından, VPN sunucusunu yapılandırabilmek ve yönetebilmek için Outline Manager'ı bilgisayarınıza kurun.
Install Outline Yöneticisi
- STEP.1Resmî Outline web sitesini ziyaret edin
Go to Outline.
- STEP.2İndirme Outline Yöneticisi
"Get Outline Manager" bölümünden bilgisayarınızın işletim sistemine (Windows, macOS veya Linux) uygun olan Outline Manager sürümünü indirin.
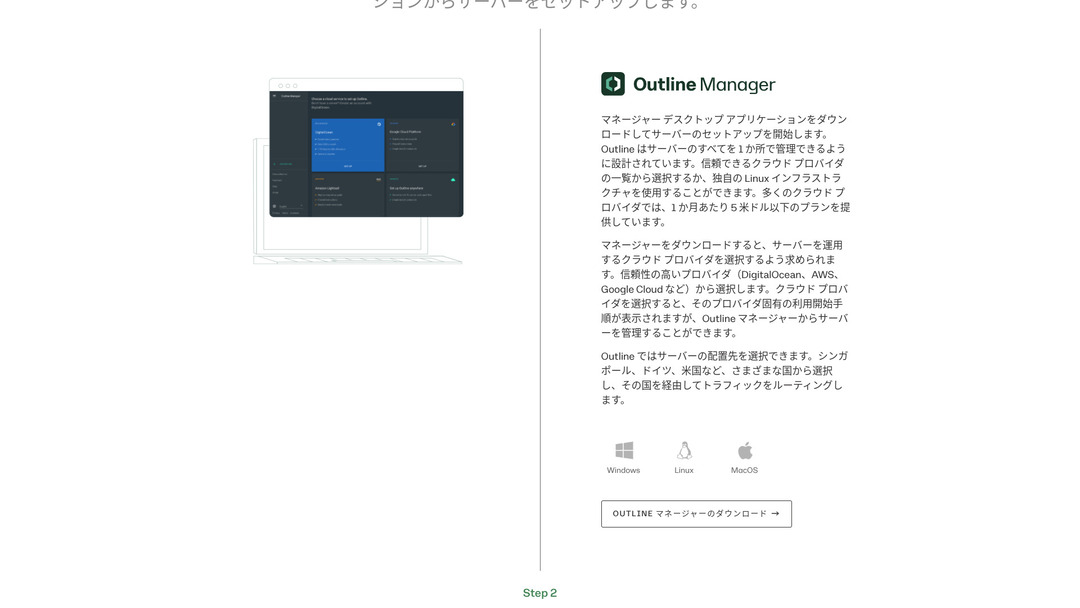
- STEP.3Install
İndirilen dosyayı çalıştırın ve Outline Manager'ı kurmak için ekrandaki talimatları izleyin.
Adım 3: Outline Manager ile VPS'inizde bir Outline Sunucusu Kurun
Use Outline Yöneticisi to install an Outline sunucu on ABLENET VPS.
Outline Manager ile VPS'inizde bir Outline Sunucusu Kurun
- STEP.1Launch Outline Yöneticisi
After installation is complete, launch Outline Yöneticisi.
- STEP.2Click "Set up sunucu"
İlk kez çalıştırdığınızda sunucu kurulum ekranı görünür. "Set up server" seçeneğine tıklayın.
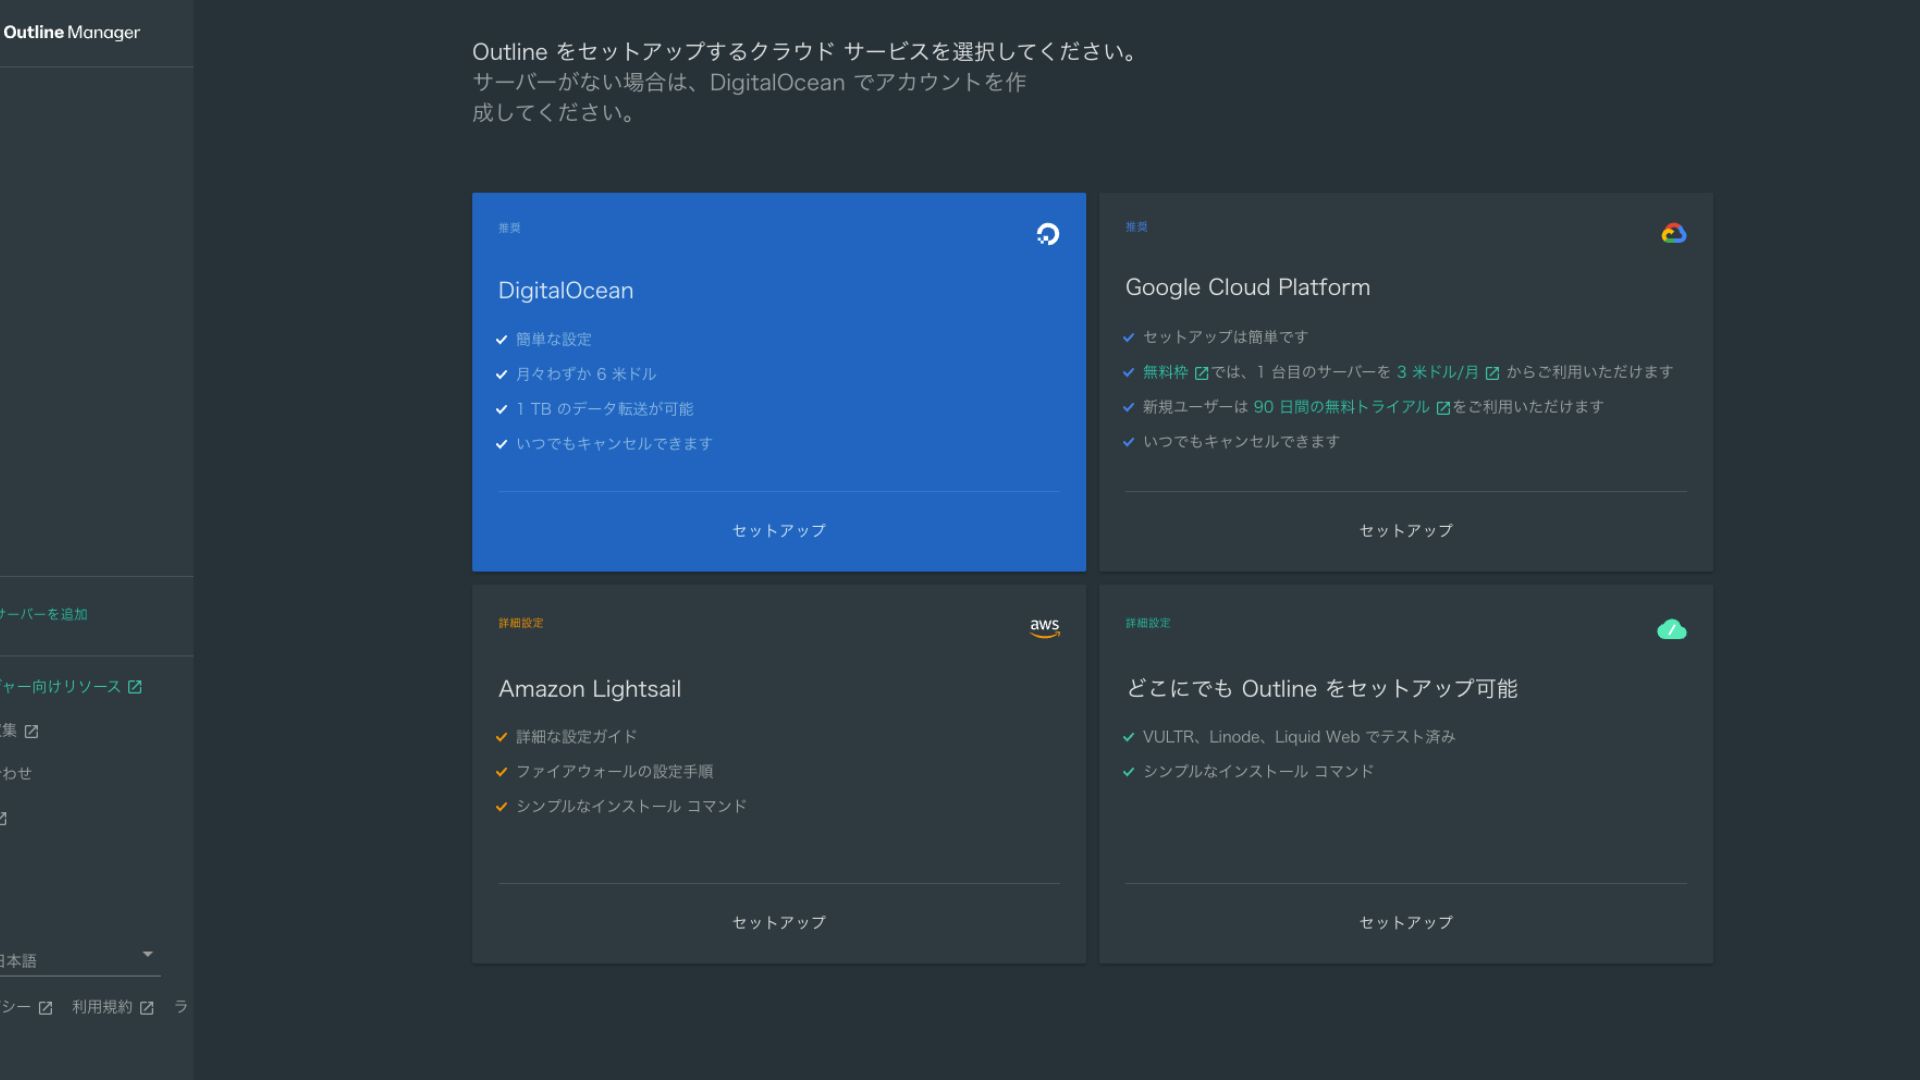
- STEP.3Select "Set up Outline anywhere"
Bulut sağlayıcı seçim ekranını göreceksiniz. "Set up Outline anywhere" seçeneğini belirleyin.
- STEP.4Enter the installation command
Ekranda Outline sunucusunu VPS'inize kurmak için kullanılan komut gösterilir. Bu komutu manuel olarak girin.
 Hikaru Ono
Because you cannot copy and paste it, be careful not to make any mistakes.
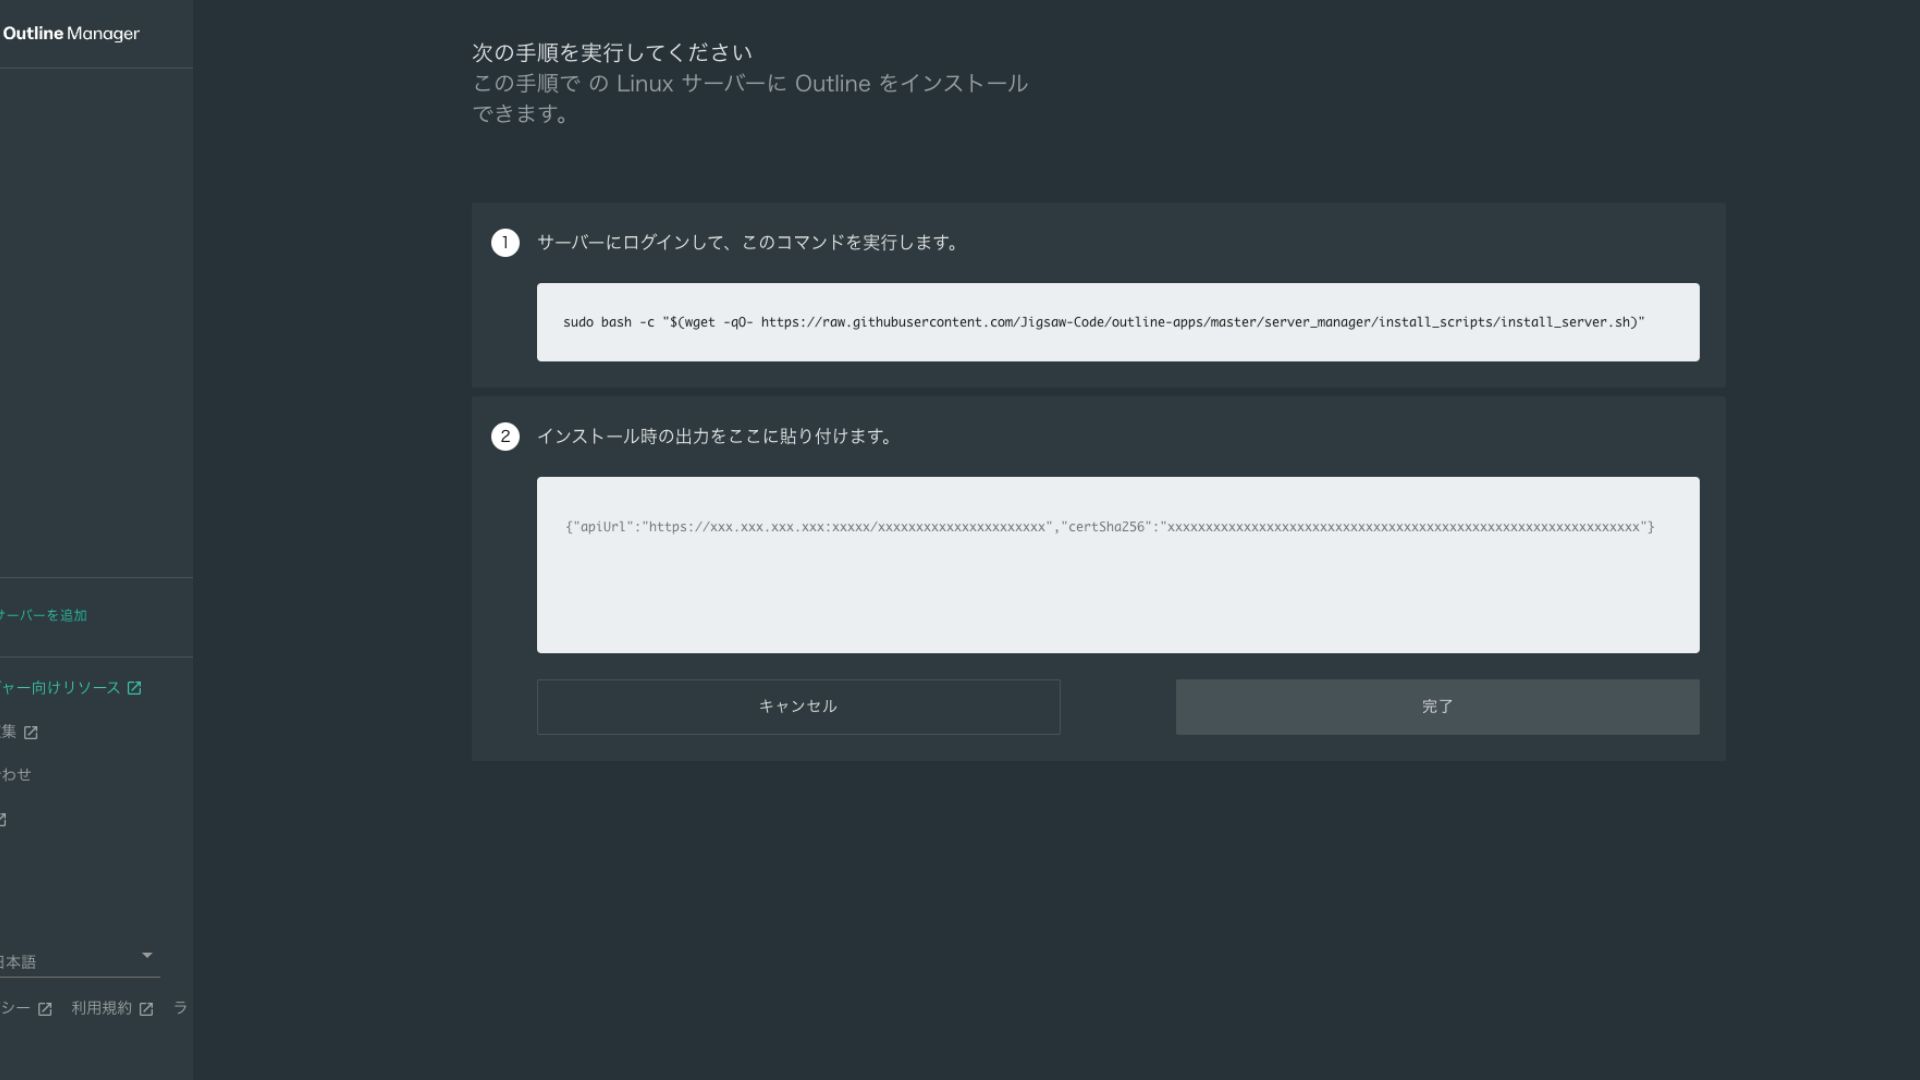
- STEP.5Run the command
- Kurulum birkaç dakika sürebilir. Ekranda gösterilen mesajları dikkatlice izleyin ve bitene kadar bekleyin.
- You may be asked a few questions along the way, but in most cases pressing Enter to accept the default choice is fine.
- STEP.6Bilgileri Outline Manager'a girin
Kurulum tamamlandıktan sonra Outline Manager, "Server details" bilgilerini gireceğiniz bir ekran gösterir.
- Admin API URL: VPS'e kurulum sırasında oluşturulan API URL'si burada gösterilir. Genellikle Outline Manager'a otomatik olarak yansıtılır, ancak yansıtılmazsa, SSH terminalinde gösterilen API URL'sini kopyalayıp yapıştırın.
- Server location (optional): Sunucu konumunu (örneğin Tokyo, Japonya) girebilirsiniz. Bu sadece yönetim amaçlıdır ve bağlantıyı etkilemez.
- STEP.7"Done with server" seçeneğine tıklayın
Tüm bilgileri girdikten sonra "Done with server" seçeneğine tıklayın.
Step 4: Create an Access Key and Allow VPN Connections
Outline sunucusu kurulduktan sonra, gerçek VPN bağlantısı için bir erişim anahtarı oluşturun.
Create an Access Key and Allow VPN Connections
- STEP.1Outline Manager ekranını kontrol edin
Outline Manager ekranında varsayılan bir erişim anahtarı görüntülenir. Burada Key 0 olarak etiketlenmiştir.
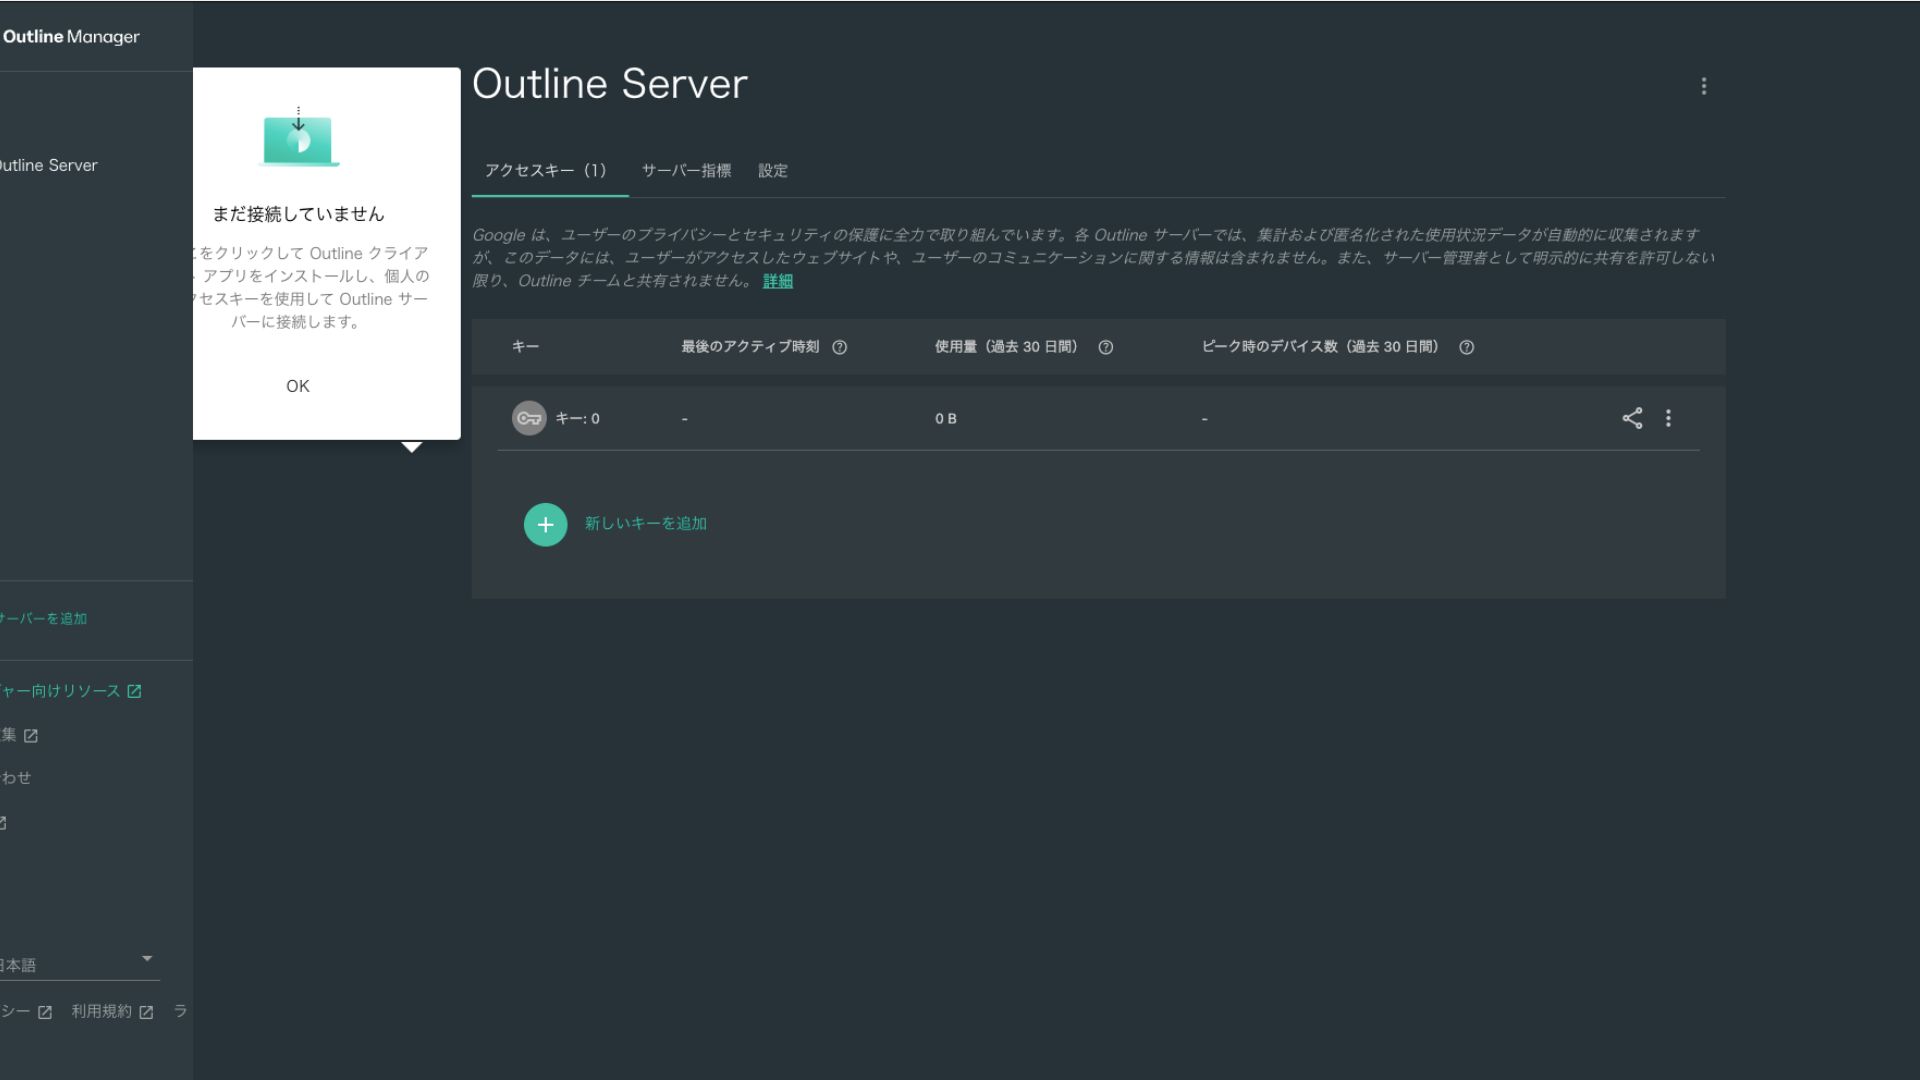
- STEP.2Erişim anahtarını paylaşın
Oluşturduğunuz erişim anahtarı, Outline istemcisi ile bağlanırken gereklidir. Erişim anahtarını seçtiğinizde, "Share invite" etiketli bir düğme görünür.
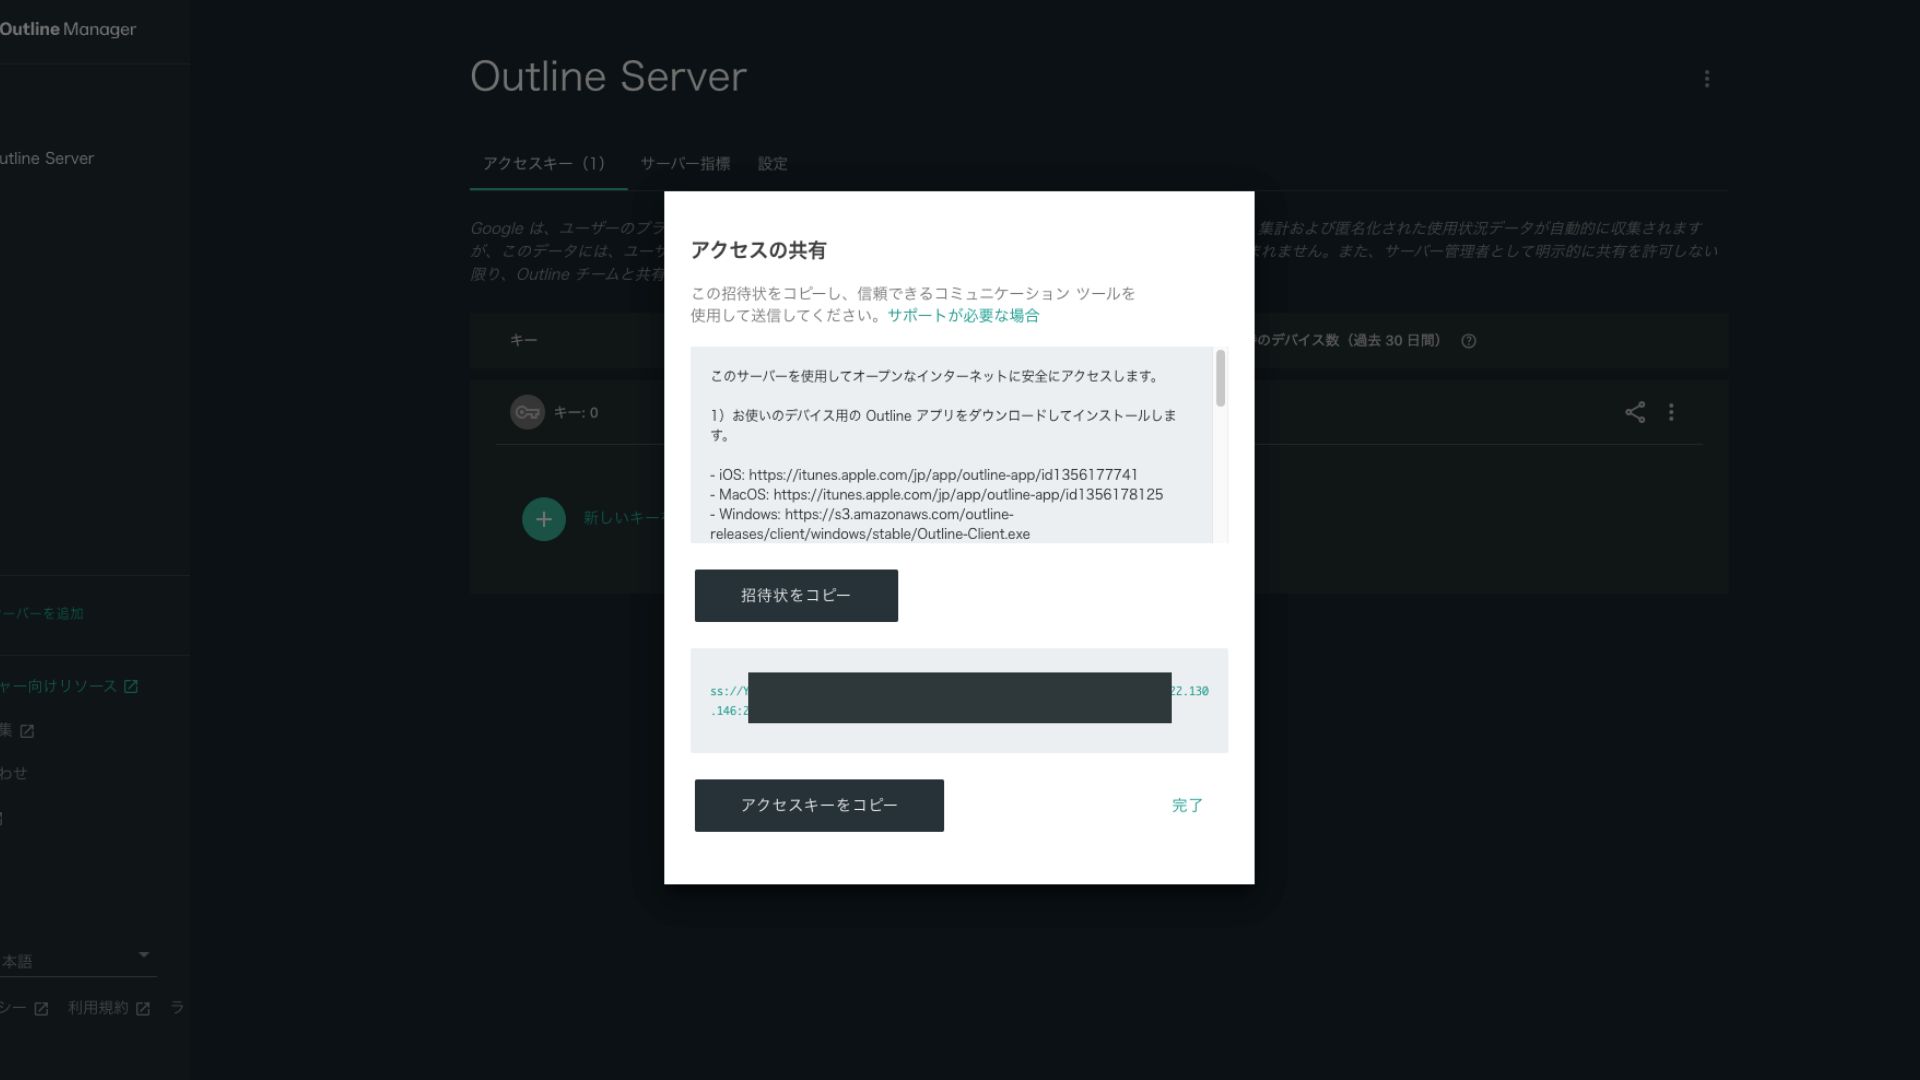
Buna tıklamak erişim anahtarı URL'sini kopyalar. Bu URL'yi VPN üzerinden bağlanmak istediğiniz cihazla paylaşın.
Step 5: Install the Outline Client and Connect to the VPN
Install the Outline client on the device you want to use for the VPN connection (PC, smartphone, tablet, and so on). This time, I installed it on an Android smartphone.
Connect to Outline VPN Using the Issued Access Key
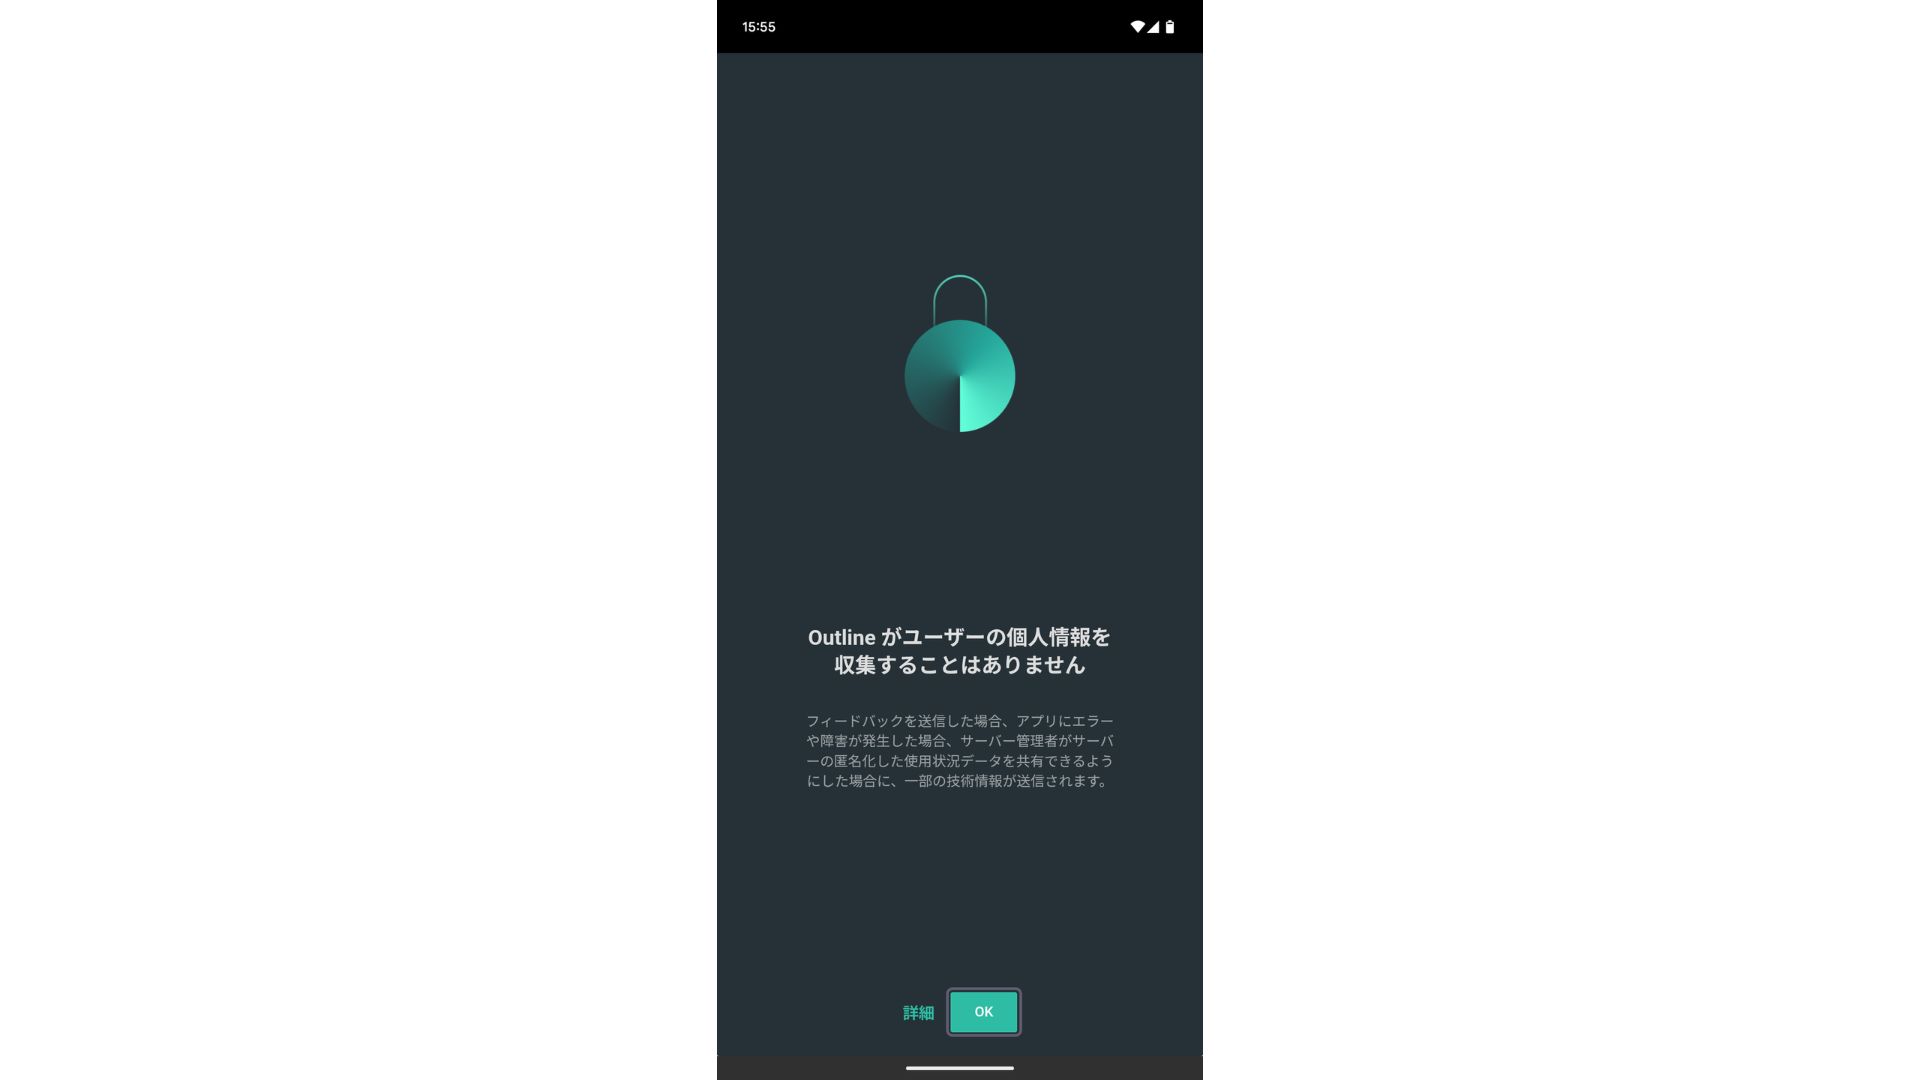
- STEP.1Launch the Outline client
Launch the Outline client you installed.
- STEP.2Add the access key
- On a PC: "Add server" veya benzeri bir düğmeye tıklayın, Adım 4'te kopyaladığınız erişim anahtarı URL'sini yapıştırın ve "Add server" seçeneğine tıklayın.
- On a smartphone or tablet: Uygulamayı açtığınızda bir erişim anahtarı girmeniz istenebilir. Adım 4'te paylaşılan erişim anahtarı URL'sini kopyalayıp yapıştırın. Bir QR kodu gösteriliyorsa bunu da tarayabilirsiniz.
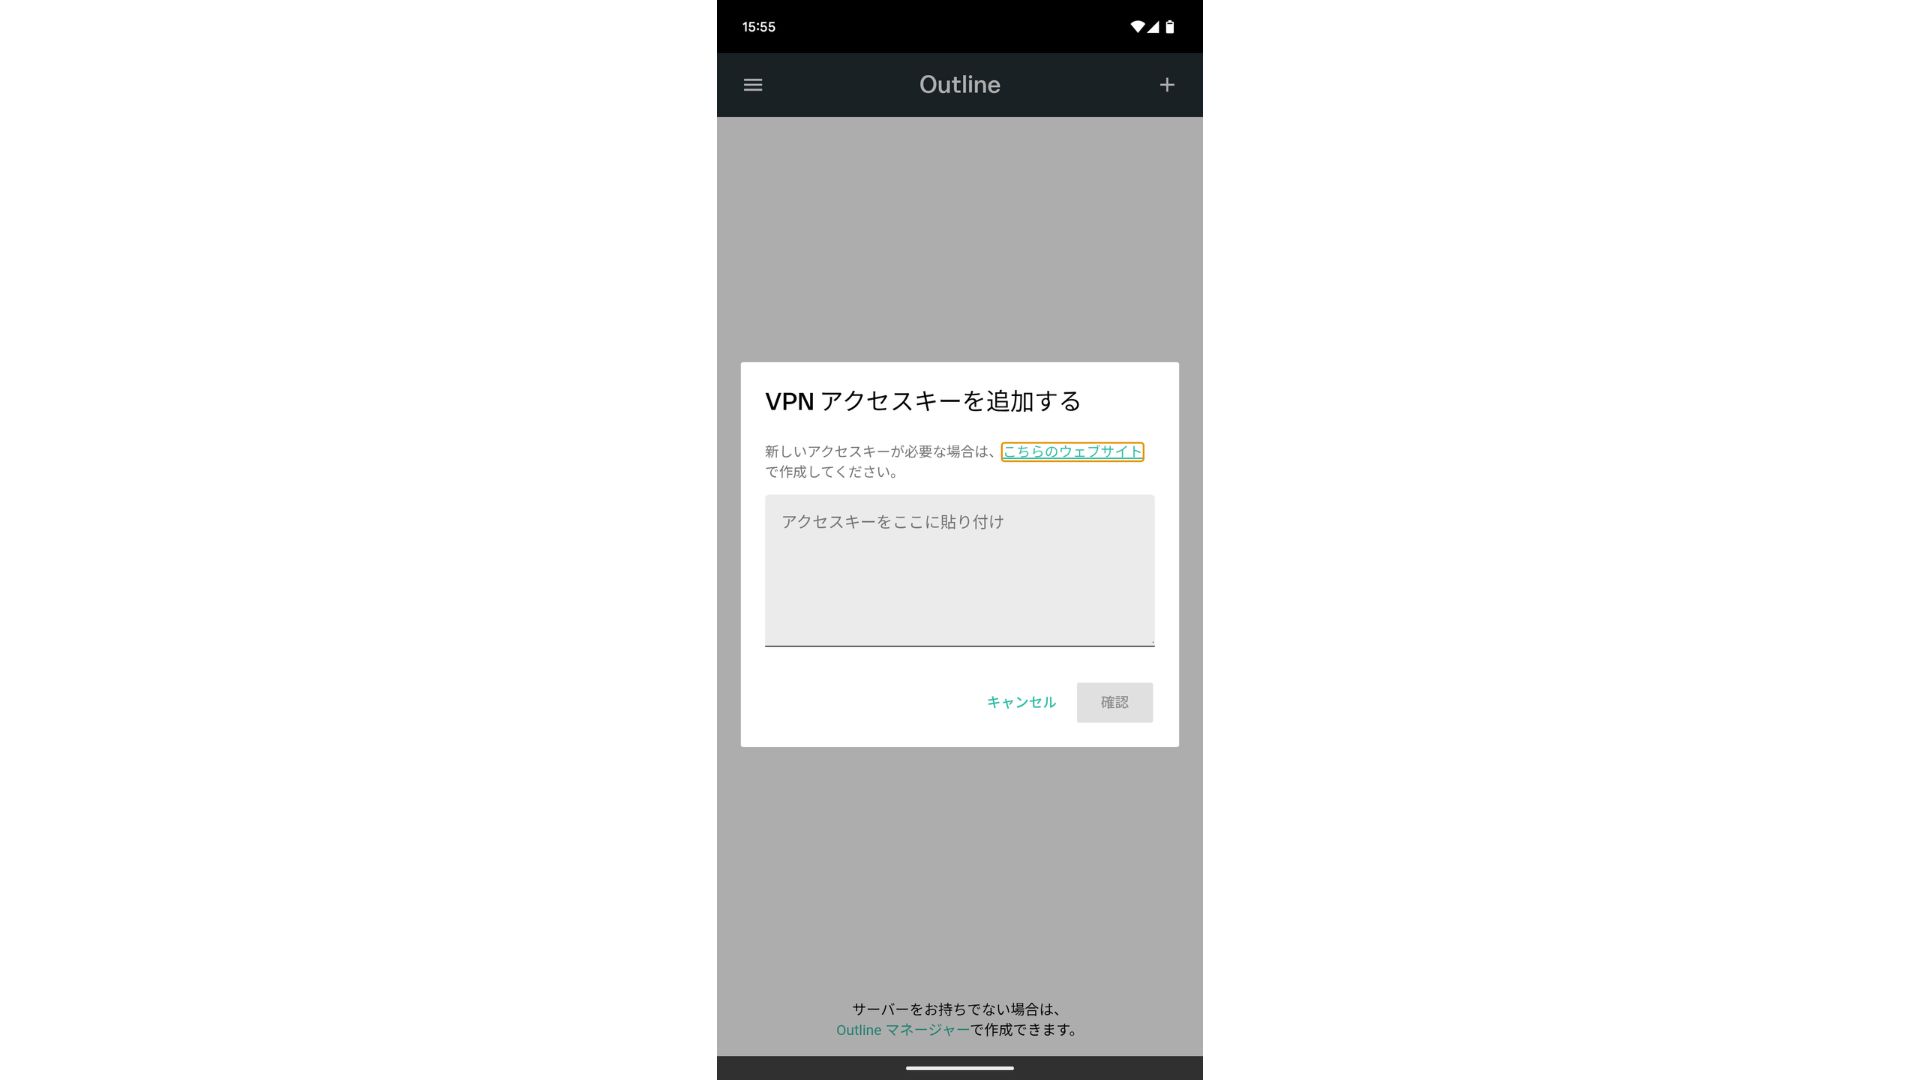
After adding the access key, press Confirm.
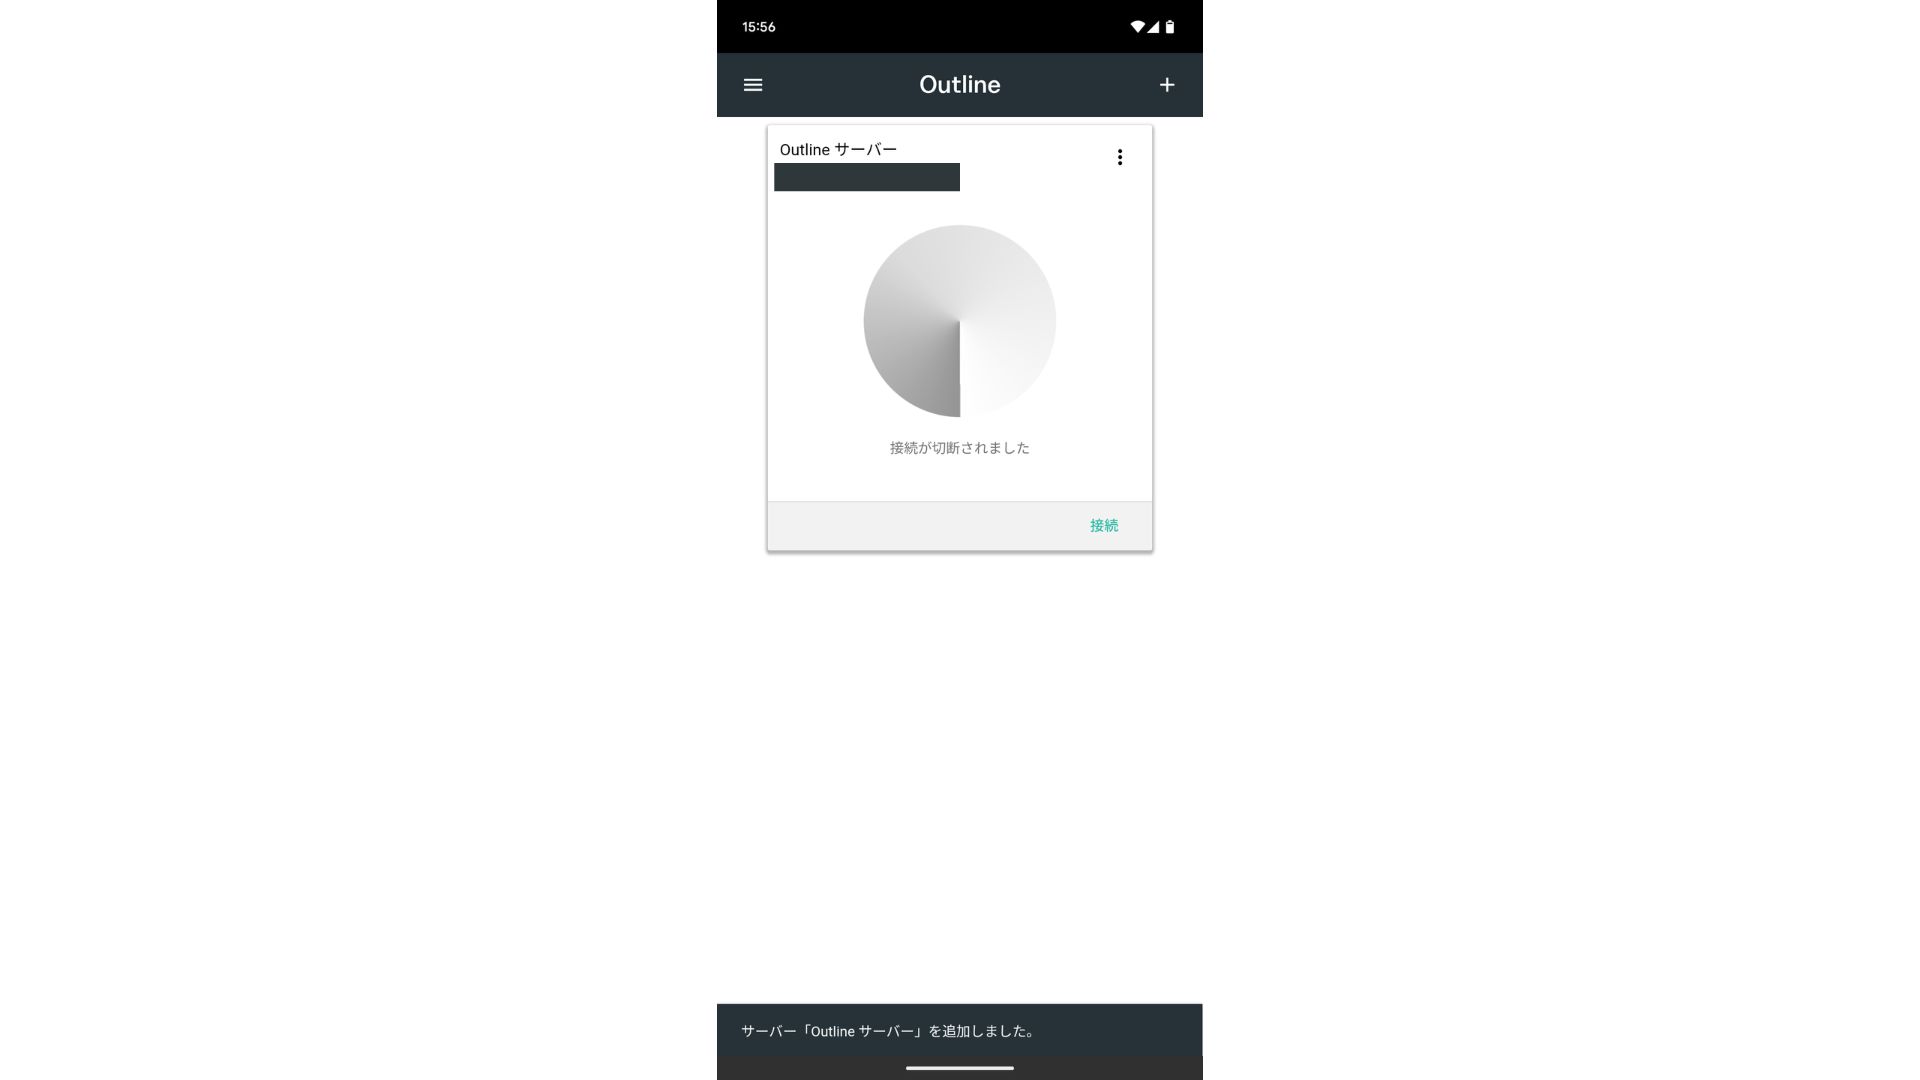
- STEP.3Connect
Sunucu eklendikten sonra "Connect" düğmesine basın.
Tap "OK" on the connection request.
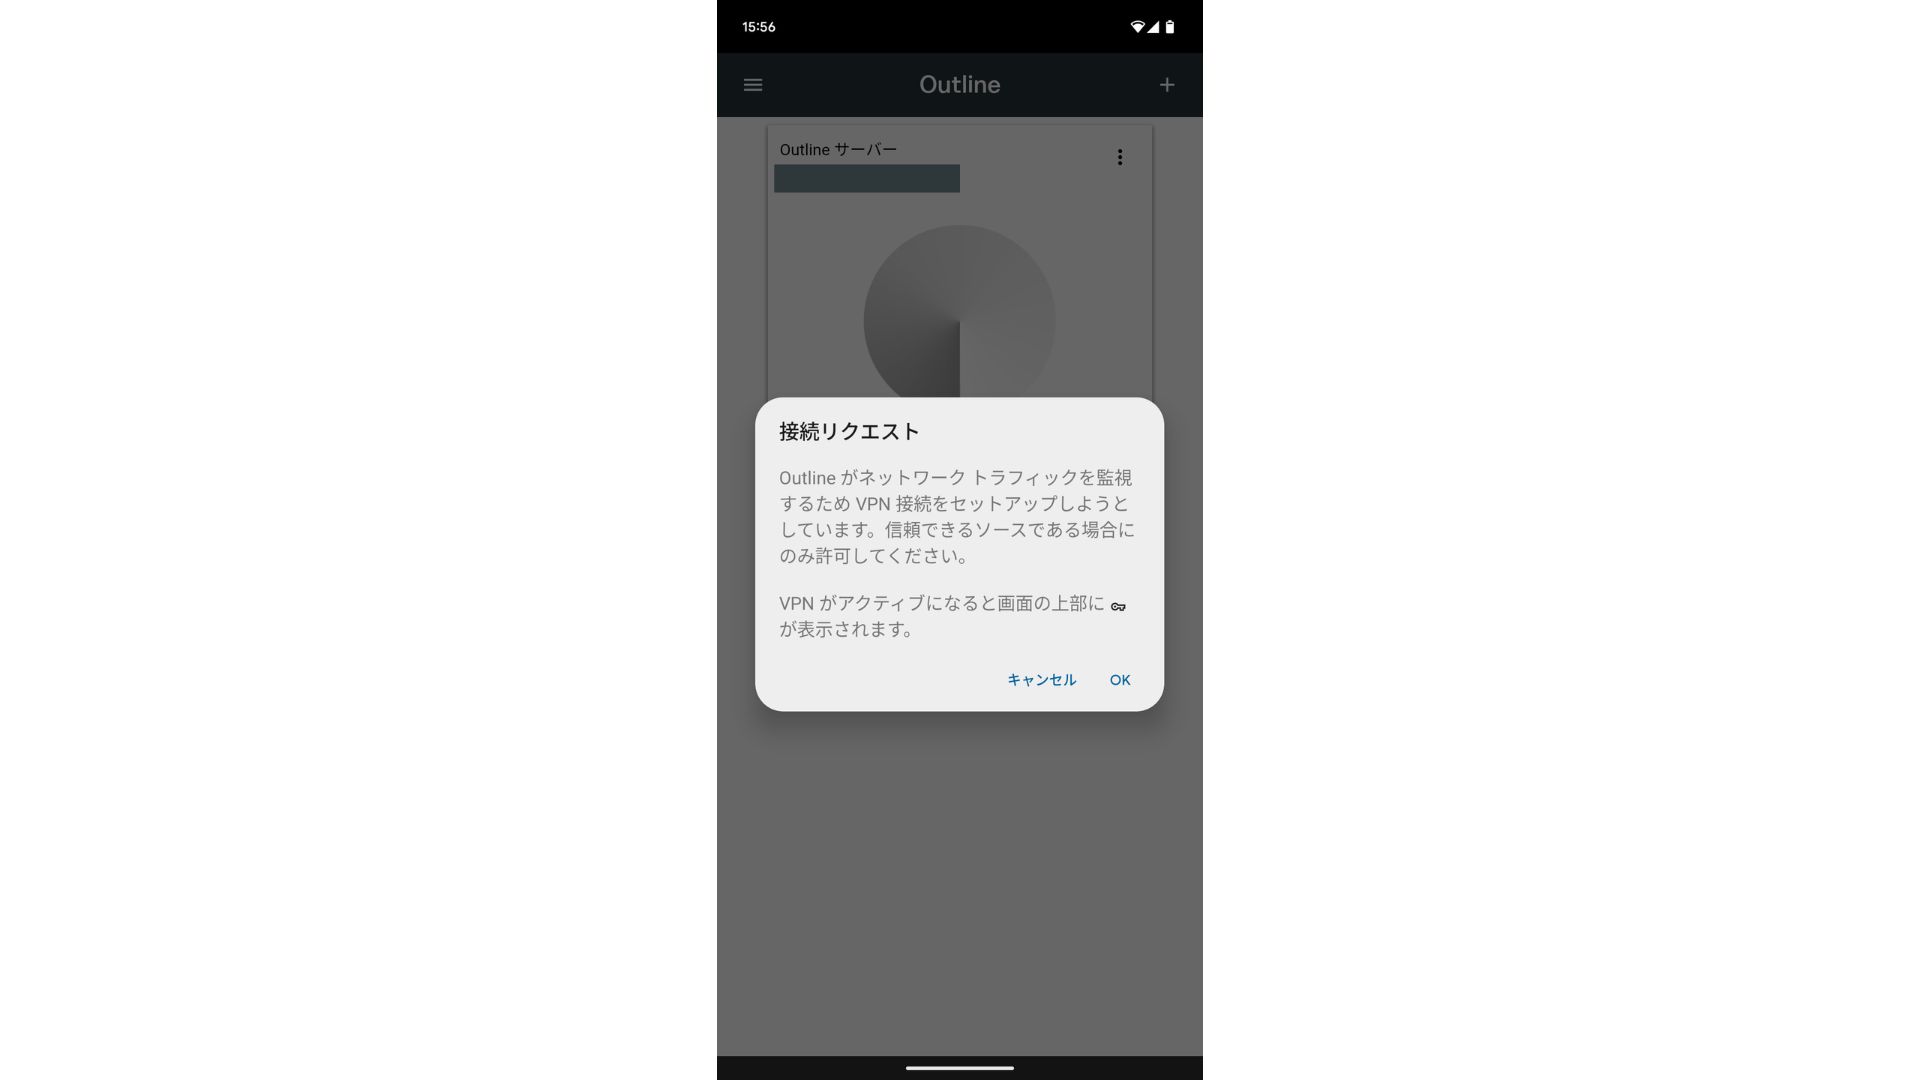
The connection is now complete.
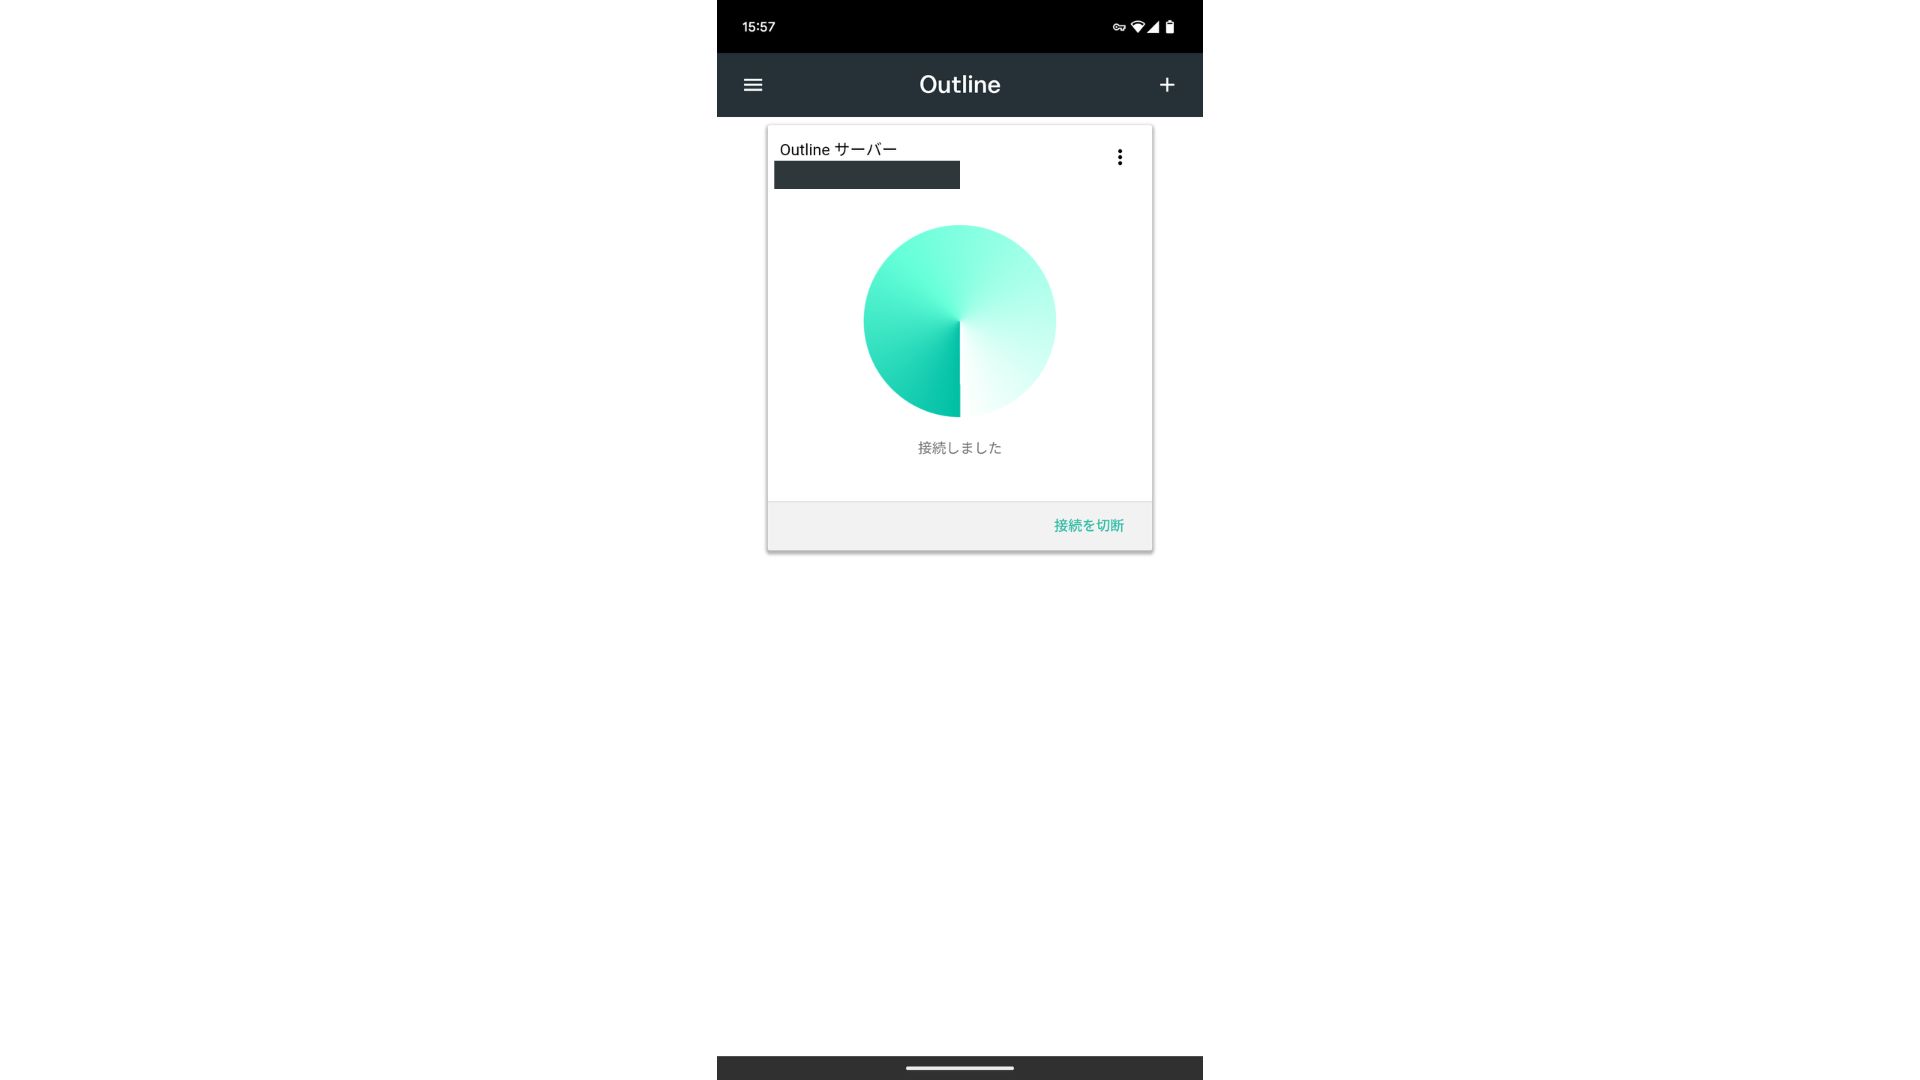
Sunucu eklendikten sonra bir Connect düğmesi belirir. Bu düğmeye tıklamak VPN bağlantısını başlatır.
With that, your VPN connection using Outline VPN and ABLENET VPS tamamlandı. İnternet trafiğiniz şifrelenerek daha güvenli hale getirilir ve seçtiğiniz sunucunun konumundan yönlendirilir.
ABLENET VPS and Outline VPN Are Fast and Comfortable
People often say internet speeds are slower over a VPN, so you may be wondering how fast ABLENET VPS is. When I measured it, it hit 130Mbps, which showed that it provides comfortable performance without frustration.
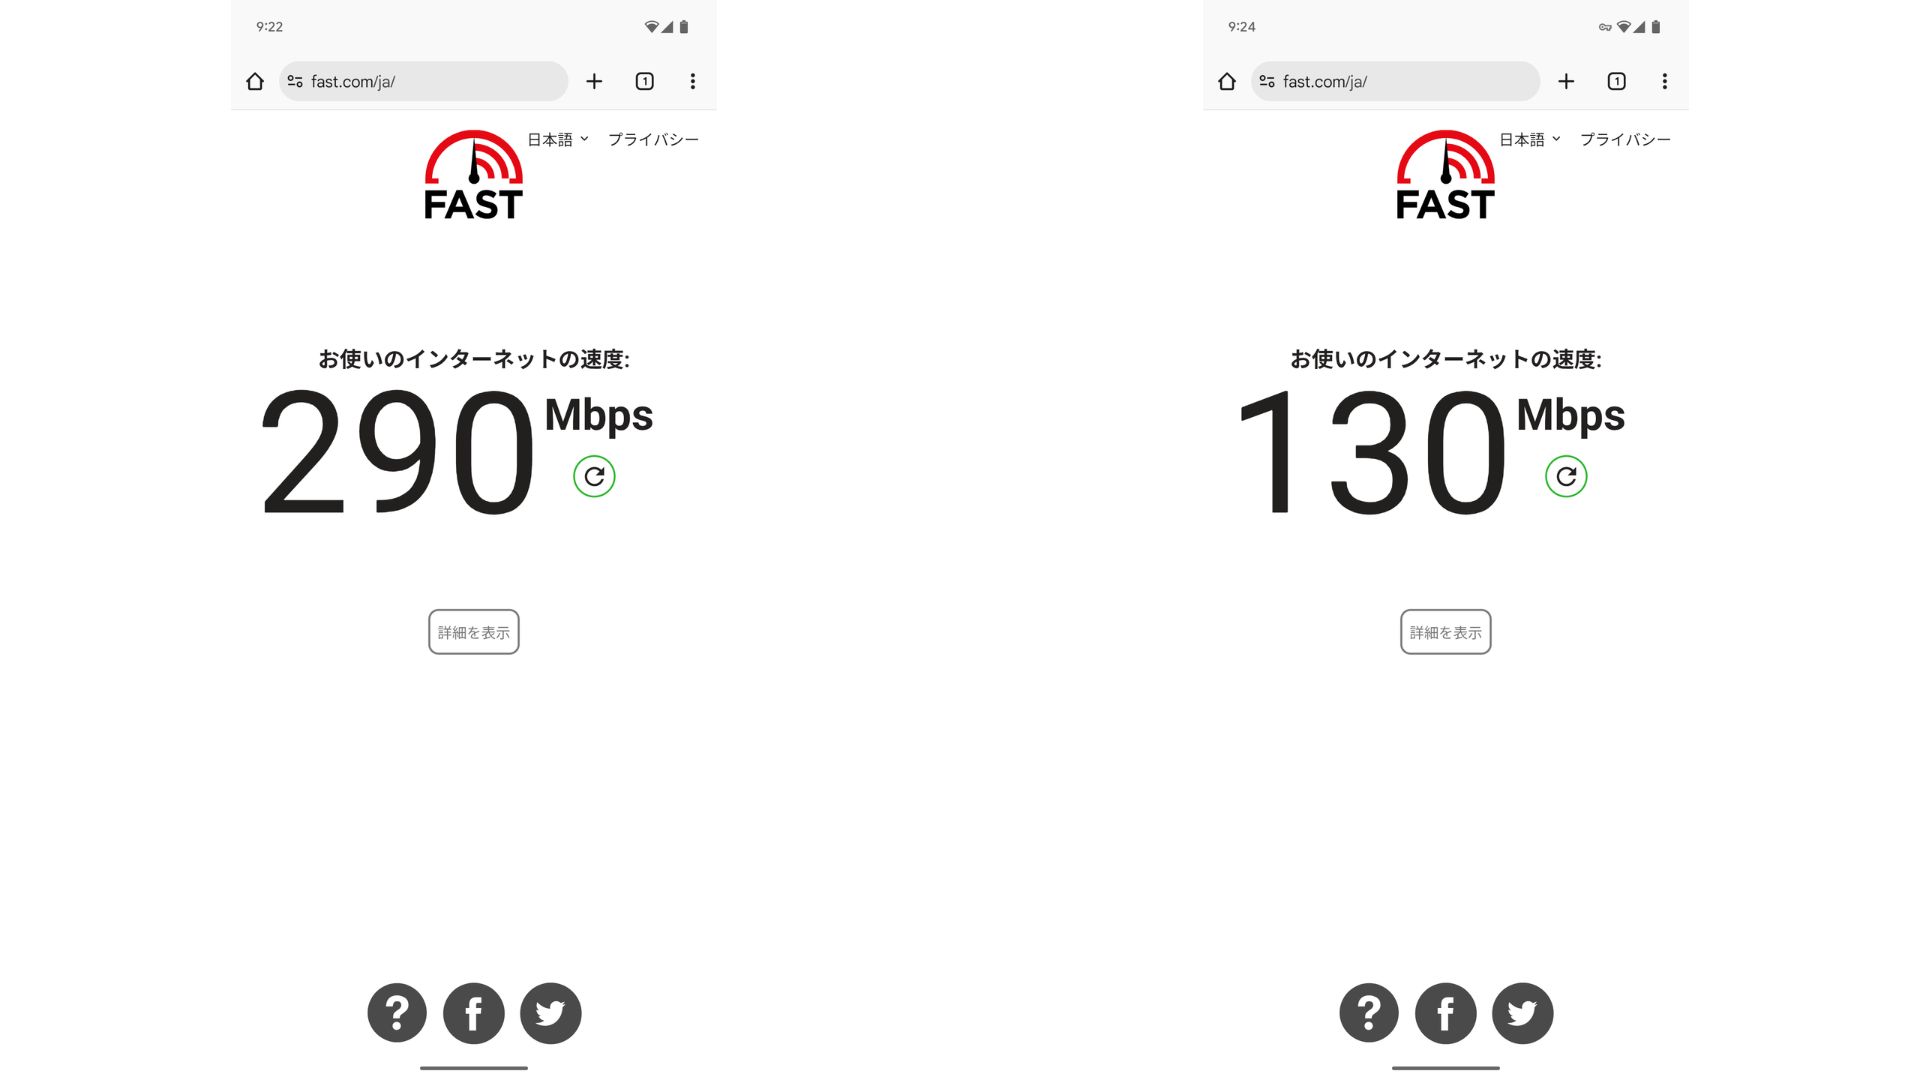
VPN olmamasına kıyasla hızı yaklaşık yarı yarıya korur. Bu performans seviyesine ulaşabilmesinin nedeni, ABLENET VPS uses a shared 200Mbps line. Since 100Mbps is more common in general, it is fast.

Hikaru Ono
Thanks to ABLENET VPS, I was able to communicate at a very high speed.
ABLENET VPS Specs and Pricing
| Server tür | VPS |
| Connection speed | Shared 200Mbps |
| IPv4 | 1 address |
| IPv6 | 65,536 addresses |
| Traffic allowance | Unlimited |
| Recommended plan and contract term | V1 annual plan |
| Virtual CPU | 2 cores |
| Memory | 1.5GB |
| Storage | 40GB SSD or 100GB HDD |
| Trial / refund guarantee | 10-gün ücretsiz trial |
| Monthly price (12-month contract) | 968 yen |
| Initial admin fee | Ücretsiz |
| Support | |
| Uptime | 99.99% or higher |
| OS | Ubuntu Server 22.04 LTS / Ubuntu Server 20.04 LTS / AlmaLinux 9.5 / AlmaLinux 8.10 / Rocky Linux 9.5 / Rocky Linux 8.10 / Oracle Linux 9.5 / Oracle Linux 8.10 / CentOS Stream8 / CentOS Stream9 / Minecraft Server(ubuntu/java/Integrated)/Rust Server(ubuntu)/Palworld Server(ubuntu)/ARK Server(ubuntu)/7days Server(ubuntu)/Valheim Server(ubuntu)/Ubuntu Desktop 22.04 with MT4/5/Ubuntu Desktop 22.04 with AutoGPT/ CentOS 7.9 and more |
Summary
With Outline VPN, which makes it easy to build a VPN, even people who have never used a VPN before can get started in a short time.
However, because VPNs tend to be slower, I recommend ABLENET VPS, hızlı bir bağlantı sağlar. Yıllık faturalandırma ile ayda 1.000 yen'den daha ucuza mal olur, bu nedenle mükemmel bir fiyat-performans oranı sunar. Her şeyden önce, sınırsız veri aktarımı ve %99,99'un üzerindeki çalışma süresiyle kararlılığı, stressiz bir internet ortamının keyfini çıkarmanızı sağlar.
ABLENET VPS is a stable VPS with 99.99% uptime, even though it is affordably priced. It offers a wide range of plans, from the accessible V0 plan with 0.5GB of memory to the high-spec V5 plan with 16GB of memory, so you can find the right option for your needs.
10-gün ücretsiz trial