Descarcă de pe site-ul oficial
PR
VPS
Configurare ușoară: conexiuni VPN securizate cu Outline și XServer VPS
Publicat: 2025.06.26
Actualizat: 2025.06.26
Vrei o securitate mai puternică pe internet, dar te îngrijorează faptul că configurarea va fi dificilă? Vrei să folosești servicii japoneze din străinătate, dar nu poți să le accesezi? Te-au preocupat aceste lucruri?
Tocmai atunci o conexiune VPN devine utilă. Dacă vrei o modalitate ieftină și ușoară de a folosi un VPN, îți recomand combinația Outline VPN și XServer VPS.
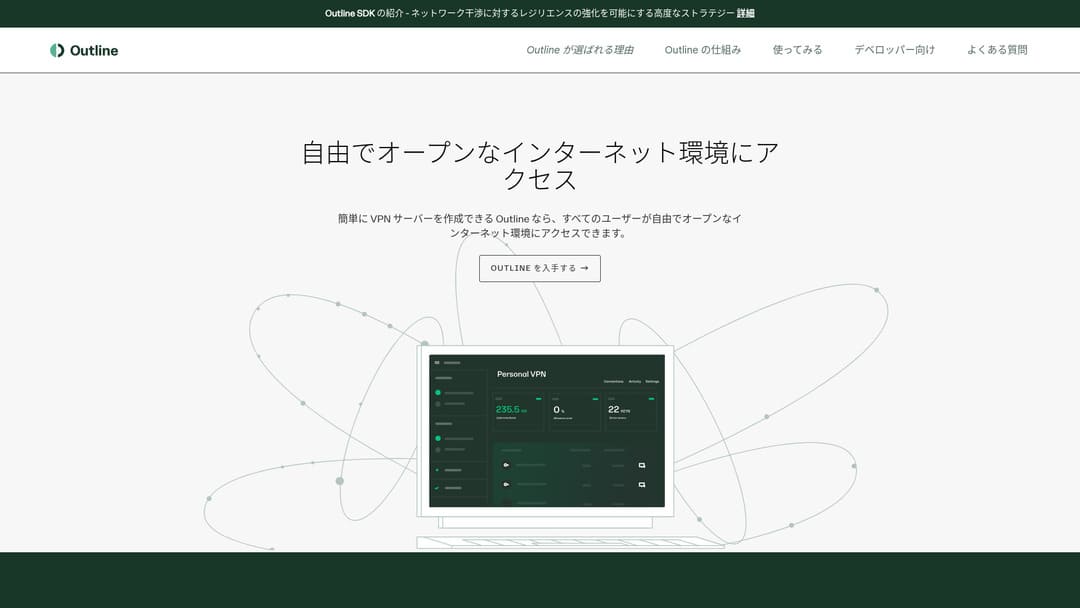
Outline VPN este un instrument VPN open-source dezvoltat de Google, iar cel mai mare atu al său este simplitatea în utilizare. By using XServer VPS, oferit de Xserver Inc., o companie japoneză importantă, cunoscută pentru medii de server performante și stabile, poți construi propriul tău mediu VPN confortabil și sigur.
Dacă te gândești „Ce este Outline VPN?" sau „VPS sună dificil...”, nu-ți face griji. După ce citești acest articol, vei putea configura o conexiune VPN fără să te pierzi și vei putea să te bucuri de o experiență sigură și protejată pe internet.
Început cu XServer VPS: Outline VPN pentru începători complet
Ce este Outline VPN? O explicație simplă a unui VPN pentru începători
Un VPN (Virtual Private Network) este o tehnologie care creează un tunel criptat pe internet și împiedică terții să asculte sau să modifice comunicațiile tale. Prin redirecționarea traficului printr-un server VPN, poate ascunde și adresa ta IP reală și poate crește anonimatul.
Outline VPN is designed to make this VPN connection process extremely simple.
Outline este o aplicație gratuită și ușor de folosit pentru conectarea la un VPN, oferită de Jigsaw, parte din Google. Chiar dacă nu ai lansat niciodată un VPN până acum, poți începe să-l folosești în doar câteva clicuri.
Nu necesită cunoștințe tehnice dificile. Scopul este ca folosirea VPN-ului să fie la fel de ușoară ca instalarea unei aplicații și apăsarea unui buton pentru a termina conexiunea.
De ce Outline VPN și XServer VPS formează o combinație atât de puternică
Outline VPN itself is simple and easy to use, but the server that supports it is just as important. That is where XServer VPS comes in.
XServer VPS is a VPS service from a long-established, high-speed rental server with the No. 1 domestic market share. It offers everything from an affordable 2GB plan to large-capacity 8GB plans. Because it provides phone and email support, even people with no VPS experience can use it casually for VPN connections or website creation.
Până la 30% reducere până la 5 august 2025, plus o perioadă de probă gratuită de 10 zile
XServer VPS se remarcă prin mediul său de rețea rapid și stabil, precum și prin sistemul său solid de suport. Administrarea propriului server necesită ceva muncă, dar când îl combini cu Outline VPN, obții următoarele avantaje.
- Localizare internă de încredere: Deoarece serverul este situat în Japonia, îl poți folosi cu încredere.
- Securitate ridicată: Deoarece îl administrezi tu însuți, poți aplica corect măsurile de securitate.
- Viteză stabilă de comunicare: Deoarece poți folosi infrastructura de înaltă performanță a Xserver, te poți aștepta la viteze de conexiune confortabile.
- Raport cost-performanță: Comparativ cu serviciile VPN închiriate, poate fi mai economic pe termen lung. Cu cât contractul este mai lung, cu atât devine mai ieftin.
Construirea propriului server VPN poate părea dificilă, dar cu Outline Manager îl poți configura ușor introducând doar câteva comenzi.
Ușor de folosit: construiește Outline VPN pe XServer VPS în 6 pași

Now let me walk you through the actual steps for building Outline VPN on XServer VPS.
Pasul 1: Pregătește XServer VPS - începe aici
Dacă nu te-ai înscris la XServer VPS yet, start by completing the contract.
Preparing XServer VPS
- STEP.1: Create an account on the official XServer websiteGo to XServer VPS. Click Apply now. If you do not already have an account, choose Start now! New application.Enter your email address, name, and other required information to complete registration.
- STEP.2: Apply for a server in your XServer accountChoose the VPS plan that matches your needs. If this is your first time, it is best to start with a relatively affordable plan. The 12-month 2GB plan is a good value at the campaign price.
- STEP.3: Complete the contract procedureFollow the on-screen instructions to finish the contract process.
- STEP.4: Choose the server OSOn the screen where you choose the server OS, I strongly recommend selecting the latest stable version of Ubuntu or Debian. Those are the recommended environments for Outline VPN, and setup will go more smoothly.
- STEP.5: Initial setupAfter the contract is complete, log in to Xserver's server panel and carry out the initial VPS setup. This includes setting the hostname and the root password. Make sure to choose a strong root password and store it safely so you do not forget it.
- STEP.6: Confirm SSH accessTo configure the VPN server, you need to connect to the VPS over SSH.
- For Windows: Install an SSH client such as Tera Term, then confirm that you can connect using the VPS IP address, the port number (usually 22), the username (root), and the password.
- For macOS/Linux: Open Terminal and run
ssh root@your-vps-ip-address. On your first connection, you may see a security confirmation message, so type yes. Then enter the root password you set.
Pasul 2: Instalează Outline Manager - configurare ușoară
Next, install Outline Manager on your PC so you can configure and manage the VPN server.
Install Outline Manager
- STEP.1: Go to the official Outline websiteVisit Outline.
- STEP.2: Download Outline ManagerFrom the Get Outline Manager section, download the version of Outline Manager that matches your PC operating system (Windows, macOS, or Linux).
- STEP.3: Install itRun the downloaded file and follow the on-screen instructions to install Outline Manager.
Pasul 3: Construiește un server Outline pe VPS cu Outline Manager
Use Outline Manager to install an Outline server on XServer VPS.
Build an Outline server on the VPS with Outline Manager
- STEP.1: Launch Outline ManagerAfter installation is complete, launch Outline Manager.
- STEP.2: Click Set up serverWhen you launch it for the first time, the server setup screen appears. Click Set up server.
- STEP.3: Choose Use your own serverYou will be shown a cloud provider selection screen, but choose Set up Outline anywhere and use your own server.
- STEP.4: Copy the installation commandA command for installing the Outline server on your VPS will appear on the screen. Select the entire command and copy it.
- STEP.5: Connect to the VPS over SSHPaste the copied installation command into the terminal or command prompt connected over SSH and press Enter to run it.
- STEP.6: Run the command
- The installation can take several minutes. Read the messages on the screen carefully and wait until it finishes.
- You may be asked a few questions during the process, but in most cases it is fine to press Enter and accept the default choice.
- STEP.7: Enter the information into Outline ManagerWhen the installation finishes, Outline Manager displays a screen where you enter the server details.
- Administrator API URL: The API URL generated during VPS installation is shown. In most cases it is reflected in Outline Manager automatically, but if it is not shown, copy and paste the API URL displayed in the SSH terminal.
- Server location (optional): You can enter the server location, such as Tokyo, Japan. This is only for management purposes and does not affect the connection.
- STEP.8: Click Done with serverAfter entering all the information, click Done with server.
Pasul 4: Creează chei de acces și permite conexiunile VPN
Once the Outline server has been built, create the access keys that are needed for actual VPN connections.
Create access keys and allow VPN connections
- STEP.1: Check the Outline Manager screenOn the Outline Manager screen, you will see one default access key.
- STEP.2: Add a new access key if neededIf you want to create a new access key, click the Add new key button.
- STEP.3: Rename the access key if you wantYou can rename the access key you created to match the device or user that will connect. Select the key, click Edit name, and change it.
- STEP.4: Share the access keyThe access key you create is required when you connect with the Outline client. When you select the access key, a button labeled Share invite appears. Click it to copy the access-key URL, then share that URL with the device you want to connect.
Pasul 5: Instalează clientul Outline - funcționează pe orice dispozitiv
Install the Outline client on the device that will connect to the VPN, such as a PC, smartphone, or tablet.
Install the Outline client
- STEP.1: Go to the official Outline websiteVisit Outline.
- STEP.2: Download the Outline clientFrom the Get Outline Client section, download and install the Outline client for your device's operating system.
- PC (Windows, macOS, Linux): Run the downloaded file to install it.
- Smartphone / tablet (Android, iOS): Search for Outline in the App Store or Google Play Store and install it.
Pasul 6: Conectează-te la Outline VPN cu cheia de acces emisă
Once the Outline client is installed, it is time to connect to the VPN.
Connect to Outline VPN with the issued access key
- STEP.1: Launch the Outline clientLaunch the Outline client you installed.
- STEP.2: Add the access key
- For PC: Click Add server or a similar button, paste the access-key URL you copied in Step 4, and click Add server.
- For smartphone / tablet: When you launch the app, it may ask you for an access key. Copy and paste the access-key URL shared in Step 4. If a QR code is shown, you can also scan it.
- STEP.3: ConnectOnce the server has been added, a connect button appears. Click it to start the VPN connection.
- STEP.4: Confirm the connectionWhen the connection succeeds, the Outline client shows Connected, and a VPN icon appears in the status bar at the top of the screen or in a similar location.
With that, your VPN connection using Outline VPN and XServer VPS is complete. Your internet traffic is encrypted, making it safer, and it is routed through the server location you selected.
Avantajele și cazurile de utilizare ale Outline VPN și XServer VPS

Cât de rapid este? Cât de stabil este? O privire completă asupra avantajelor Outline VPN
Outline VPN is based on the Shadowsocks protocol, so you can expect communication that is relatively lightweight and fast.
By using the high-performance infrastructure of XServer VPS, you can achieve an even more stable communication environment. Still, you should understand that VPN speed can vary depending on physical distance and network congestion.
Accesează în siguranță de oriunde: cazuri de utilizare pentru Outline VPN
- Securitate on public Wi-Fi: Public Wi-Fi in places such as cafes and hotels can be weak on security. By using a VPN connection, you encrypt your communications and prevent third parties from eavesdropping on them.
- Bypassing access restrictions from overseas: If you want to access services or content that are available only in Japan while you are abroad, routing your connection through a VPN server in Japan may make that possible.
- Privacy protection: By routing traffic through a VPN server, you can hide your real IP address and make it harder for websites and advertising trackers to follow you.
- Bypassing censorship: In some countries and regions, internet censorship may be in place. Using a VPN may help you get around those restrictions.
Acces confortabil și din străinătate: ocolește restricțiile regionale
By using Outline VPN and XServer VPS, you can build a VPN server in a location you choose yourself. For example, if you want to use Japanese services from overseas, you can route your traffic through a VPS server in Japan so that it appears as if you are accessing the service from inside Japan.
As a result, you may be able to use content that had been unavailable because of regional restrictions.
Sfaturi pentru a folosi Outline VPN mai confortabil

Cum să-l folosești pe mai multe dispozitive - împărtășește-l cu familia sau echipa
The access key you create can be shared and used on multiple devices.
By issuing a new access key in Outline Manager and adding it to the Outline client on another device, you can easily use the VPN connection across multiple devices. This is convenient when you want to share a VPN with family members or a small team.
Verifică și gestionează consumul de date - previne utilizarea excesivă
In Outline Manager, you can check the data usage for each access key.
This lets you see who is using how much data, and you can also set data limits if needed. By setting limits, you can prevent unintended overuse of bandwidth.
Setări recomandate pentru a îmbunătăți și mai mult securitatea
- VPS security measures: Review the firewall settings on XServer VPS and close unnecessary ports. It is also important to keep the operating system and software fully up to date.
- Strong passwords: Set strong, hard-to-guess passwords for the VPS root account and the Outline Manager access keys.
- Two-factor authentication: Enable two-factor authentication for your Xserver account and VPS login wherever possible.
Rezumat: bucură-te de o experiență VPN sigură și confortabilă cu Outline și XServer VPS

Outline VPN provides powerful VPN functionality that goes far beyond what its simple interface might suggest. Because Outline Manager handles the difficult setup automatically, even beginners can build and use a VPN environment with confidence.
When you combine it with XServer VPS, the flexibility of Outline VPN increases even more. You can place your VPN server wherever you want and use stable, high-speed communication.
Use this article as your guide, and try building a safe and comfortable internet environment of your own with Outline VPN and XServer VPS.