Download fra den officielle hjemmeside
PR
VPS
Nem opsætning: sikre VPN-forbindelser med Outline og XServer VPS
Udgivet: 2025.06.26
Opdateret: 2025.06.26
Ønsker du stærkere internetsikkerhed, men bekymrer dig om, at opsætningen vil være svær? Vil du gerne bruge japanske tjenester fra udlandet, men kan ikke få adgang til dem? Har du haft disse bekymringer?
Det er lige præcis her, en VPN-forbindelse bliver nyttig. Hvis du vil have en billig og nem måde at bruge en VPN på, anbefaler jeg kombinationen af Outline VPN og XServer VPS.
Outline VPN er et open-source VPN-værktøj udviklet af Google, og dets største styrke er, hvor enkelt det er at bruge. Ved at bruge XServer VPS, der leveres af Xserver Inc., et stort japansk firma kendt for høj ydeevne og stabile servermiljøer, kan du opbygge dit eget behagelige og sikre VPN-miljø.
Hvis du tænker: "Hvad er Outline VPN?" eller "VPS lyder svært...", så bare rolig. Når du har læst denne artikel, kan du sætte en VPN-forbindelse op uden at fare vild og få en sikker og tryg internetoplevelse.
Kom godt i gang med XServer VPS: Outline VPN for helt begyndere
Hvad er Outline VPN? En enkel VPN forklaret for begyndere
En VPN (Virtual Private Network) er en teknologi, der opretter en krypteret tunnel på internettet og forhindrer tredjeparter i at aflytte eller manipulere din kommunikation. Ved at dirigere trafikken gennem en VPN-server kan den også skule din rigtige IP-adresse og øge anonymiteten.
Outline VPN og XServer VPS er designet til at gøre denne VPN-forbindelsesproces ekstremt enkel.
Outline er en gratis applikation, der er nem at bruge til at oprette forbindelse til en VPN, leveret af Jigsaw, som er en del af Google. Selv hvis du aldrig har startet en VPN før, kan du begynde at bruge en med blot et par klik.
Det kræver ikke svær teknisk viden. Målet er at gøre brugen af VPN lige så let som at installere en app og trykke på en knap for at fuldføre forbindelsen.
Hvorfor Outline VPN og XServer VPS er en så stærk kombination
Outline VPN i sig selv er enkelt og nemt at bruge, men serveren, der understøtter det, er lige så vigtig. Det er her, XServer VPS kommer ind i billedet.
XServer VPS er en VPS-tjeneste fra en veletableret, højhastigheds-rental server med den største indenlandske markedsandel. Den tilbyder alt fra en overkommelig 2GB-plan til store 8GB-planer. Fordi den tilbyder telefon- og e-mailsupport, kan selv folk uden VPS-erfaring bruge den uformelt til VPN-forbindelser eller oprettelse af websites.
Op til 30 % rabat indtil 5. august 2025, plus en 10 dages gratis prøveperiode
XServer VPS udmærker sig ved sit hurtige og stabile netværksmiljø samt sit stærke supportsystem. Det kræver lidt arbejde at administrere sin egen server, men når du kombinerer det med Outline VPN, opnår du følgende fordele.
- Pålidelig national placering: Da serveren er placeret i Japan, kan du bruge den med ro i sindet.
- High sikkerhed: Da du selv administrerer den, kan du implementere sikkerhedsforanstaltninger korrekt.
- Stable communication hastighed: Fordi du kan bruge Xservers højtydende infrastruktur, kan du forvente behagelige forbindelseshastigheder.
- Cost ydelse: Sammenlignet med kommercielle VPN-tjenester kan det være mere økonomisk på lang sigt. Jo længere kontrakt, jo billigere bliver det.
At bygge din egen VPN-server lyder måske svært, men med Outline Manager kan du nemt sætte den op ved blot at indtaste nogle få kommandoer.
Nem at bruge: Byg Outline VPN på XServer VPS i 6 trin

Lad mig nu guide dig igennem de faktiske trin til at bygge Outline VPN på XServer VPS.
Trin 1: Forbered XServer VPS - start her
Hvis du ikke har tilmeldt dig XServer VPS endnu, skal du starte med at oprette kontrakten.
Forberedelse af XServer VPS
- TRIN 1: Opret en konto på den officielle XServer-hjemmesideGå til XServer VPS. Klik på Apply now. Hvis du ikke allerede har en konto, skal du vælge Start now! New application.Indtast din e-mailadresse, dit navn og andre påkrævede oplysninger for at fuldføre registreringen.
- TRIN 2: Ansøg om en server på din XServer-kontoVælg det VPS-abonnement, der passer til dine behov. Hvis det er første gang, er det bedst at starte med et relativt billigt abonnement. 12-måneders abonnementet med 2 GB hukommelse giver god værdi til kampagneprisen.
- TRIN 3: Fuldfør kontraktoprettelsenFølg instruktionerne på skærmen for at fuldføre kontraktprocessen.
- TRIN 4: Vælg serverens operativsystemPå skærmen, hvor du vælger serverens OS, anbefaler jeg kraftigt at vælge den seneste stabile version af Ubuntu eller Debian. Det er de anbefalede miljøer til Outline VPN, og opsætningen vil forløbe mere glidende.
- STEP.5: Initial opsætningNår kontrakten er oprettet, skal du logge ind på Xservers serverpanel og udføre den indledende VPS-opsætning. Dette omfatter indstilling af værtsnavn og root-adgangskode. Sørg for at vælge en stærk root-adgangskode og gemme den sikkert, så du ikke glemmer den.
- TRIN 6: Bekræft SSH-adgangFor at konfigurere VPN-serveren skal du oprette forbindelse til VPS'en via SSH.
- For Windows: Installer en SSH-klient såsom Tera Term, og bekræft derefter, at du kan oprette forbindelse ved hjælp af VPS'ens IP-adresse, portnummeret (normalt 22), brugernavnet (root) og adgangskoden.
- For macOS/Linux: Åbn Terminal og kør
ssh root@your-vps-ip-address. Ved din første forbindelse ser du muligvis en sikkerhedsbekræftelse, så skriv yes. Indtast derefter den root-adgangskode, du har angivet.
Trin 2: Installer Outline Manager - nem opsætning
Installer derefter Outline Manager på din computer, så du kan konfigurere og administrere VPN-serveren.
Installer Outline Manager
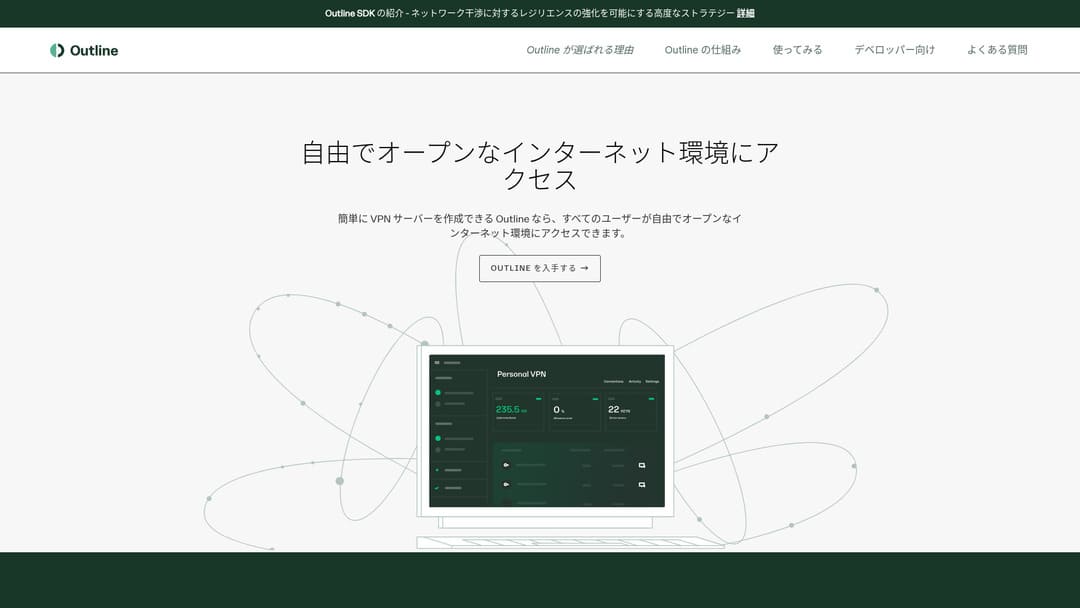
- TRIN 1: Gå til den officielle Outline-hjemmesideBesøg Outline.
- TRIN 2: Download Outline ManagerFra afsnittet Get Outline Manager skal du downloade den version of Outline Manager, der matcher din computers operativsystem (Windows, macOS eller Linux).
- TRIN 3: Installer denKør den downloadede fil, og følg instruktionerne på skærmen for at installere Outline Manager.
Trin 3: Byg en Outline-server på VPS’en med Outline Manager
Brug Outline Manager to install an Outline server on XServer VPS.
Byg en Outline-server på VPS’en med Outline Manager
- TRIN 1: Start Outline ManagerNår installationen er fuldført, skal du starte Outline Manager.
- TRIN 2: Klik på Set up serverNår du starter programmet for første gang, vises skærmen for serveropsætning. Klik på Set up server.
- STEP.3: Vælg Use your own serverDu vil se en skærm til valg af cloududbyder, men vælg Set up Outline anywhere og brug din egen server.
- TRIN 4: Kopier installationskommandoenEn kommando til installation af Outline-serveren på din VPS vises på skærmen. Vælg hele kommandoen og kopier den.
- TRIN 5: Opret forbindelse til VPS'en via SSHIndsæt den kopierede installationskommando i terminalen eller kommandoprompten, der er forbundet via SSH, og tryk på Enter for at køre den.
- TRIN 6: Kør kommandoen
- Installationen kan tage flere minutter. Læs meddelelserne på skærmen omhyggeligt, og vent, indtil den er færdig.
- Du kan blive stillet et par spørgsmål under processen, men i de fleste tilfælde det er fint at trykke på Enter og acceptere standardvalget.
- TRIN 7: Indtast oplysningerne i Outline ManagerNår installationen er færdig, viser Outline Manager en skærm, hvor du skal indtaste serveroplysningerne.
- Administrator-API-URL: Den API-URL, der genereres under VPS-installationen, vises. I de fleste tilfælde overføres den automatisk til Outline Manager, men hvis den ikke vises, skal du kopiere og indsætte API-URL'en, der vises i SSH-terminalen.
- Serverplacering (valgfri): Du kan indtaste serverens placering, f.eks. Tokyo, Japan. Dette er kun til administrationsformål og påvirker ikke forbindelsen.
- TRIN 8: Klik på Done with serverNår du har indtastet alle oplysningerne, skal du klikke på Done with server.
Trin 4: Opret adgangsnøgler og tillad VPN-forbindelser
Når Outline-serveren er bygget, skal du oprette de adgangsnøgler, der er nødvendige for de faktiske VPN-forbindelser.
Opret adgangsnøgler og tillad VPN-forbindelser
- TRIN 1: Tjek Outline Manager-skærmenPå Outline Manager-skærmen vil du se én standardadgangsnøgle.
- TRIN 2: Tilføj en ny adgangsnøgle efter behovHvis du vil oprette en ny adgangsnøgle, skal du klikke på knappen Add new key.
- TRIN 3: Omdøb adgangsnøglen, hvis du vilDu kan omdøbe den oprettede adgangsnøgle, så den passer til den enhed eller bruger, der skal oprette forbindelse. Vælg nøglen, klik på Edit name, og rediger det.
- TRIN 4: Del adgangsnøglenDen adgangsnøgle, du opretter, er nødvendig, når du forbinder med Outline-klienten. Når du vælger adgangsnøglen, vises en knap med teksten Share invite. Klik på den for at kopiere URL’en til adgangsnøglen, og del derefter denne URL med den enhed, du vil forbinde.
Trin 5: Installer Outline Client - virker på alle enheder
Installer Outline-klienten på den enhed, der skal oprette forbindelse til VPN'en, for eksempel en pc, smartphone eller tablet.
Installer Outline-klienten
- STEP.1: Go to the official Outline websiteBesøg Outline.
- TRIN 2: Download Outline-klientenFra afsnittet Get Outline Client skal du downloade og installere Outline-klienten til din enheds operativsystem.
- PC (Windows, macOS, Linux): Kør den downloadede fil for at installere den.
- Smartphone / tablet (Android, iOS): Søg efter Outline i App Store eller Google Play Store, og installer den.
Trin 6: Opret forbindelse til Outline VPN med den udstedte adgangsnøgle
Når Outline-klienten er installeret, er det tid til at oprette forbindelse til VPN'en.
Opret forbindelse til Outline VPN med den udstedte adgangsnøgle
- TRIN 1: Start Outline-klientenStart den Outline-klient, du installerede.
- TRIN 2: Tilføj adgangsnøglen
- For PC: Klik Add server eller en lignende knap, indsæt adgangsnøglens URL, som du kopierede i trin 4, og klik på Add server.
- For smartphone / tablet: Når du starter appen, beder den dig muligvis om en adgangsnøgle. Kopier og indsæt adgangsnøglens URL delt i trin 4. Hvis der vises en QR-kode, kan du også scanne den.
- TRIN 3: ForbindNår serveren er tilføjet, vises en forbindelsesknap. Klik på den for at starte VPN-forbindelsen.
- TRIN 4: Bekræft forbindelsenNår forbindelsen lykkes, viser Outline-klienten Connected, og et VPN-ikon vises i statuslinjen øverst på skærmen eller et lignende sted.
Outline VPNOutline VPN og XServer VPS er fuldført. Din internettrafik er krypteret, hvilket gør den mere sikker, og den ledes gennem den serverplacering, du har valgt.
Fordele og brugsscenarier for Outline VPN og XServer VPS

Hvor hurtigt er det? Hvor stabilt er det? Et fuldt kig på fordelene ved Outline VPN
Outline VPN er baseret på Shadowsocks-protokollen, så du kan forvente kommunikation, der er relativt let og hurtig.
Ved at bruge den højtydende infrastruktur på XServer VPS, kan du opnå et endnu mere stabilt kommunikationsmiljø. Alligevel skal du være opmærksom på, at VPN-hastigheden kan variere afhængigt af fysisk afstand og netværksbelastning.
Få sikker adgang fra hvor som helst: brugsscenarier for Outline VPN
- Sikkerhed på offentligt Wi-Fi: Offentligt Wi-Fi på steder som caféer og hoteller kan have svag sikkerhed. Ved at bruge en VPN-forbindelse krypterer du din kommunikation og forhindrer tredjeparter i at aflytte dem.
- Omgåelse af adgangsbegrænsninger fra udlandet: Hvis du vil tilgå tjenester eller indhold, der kun er tilgængeligt i Japan, mens du er i udlandet, kan det lade sig gøre ved at dirigere din forbindelse gennem en VPN-server i Japan.
- Beskyttelse af privatlivets fred: Ved at dirigere trafikken gennem en VPN-server kan du skjule din rigtige IP-adresse og gøre det sværere for websteder og annoncesporere at følge dig.
- Omgåelse af censur: I nogle lande og regioner kan der være internetcensur. Brug af en VPN kan hjælpe dig med at omgå disse restriktioner.
Behagelig adgang fra udlandet også: Omgå regionale restriktioner
Ved at bruge Outline VPN og XServer VPS, kan du bygge en VPN-server på en placering, du selv vælger. Hvis du for eksempel vil bruge japanske tjenester fra udlandet, kan du route din trafik gennem en VPS-server i Japan, så det ser ud som om, du tilgår tjenesten fra Japan.
Som et resultat kan du muligvis bruge indhold, der ellers har været utilgængeligt på grund af regionale restriktioner.
Tips til at bruge Outline VPN mere komfortabelt

Sådan bruger du det på flere enheder - del med familie eller et team
Den adgangsnøgle, du opretter, kan blive delt og brugt på flere enheder.
Ved at udstede en ny adgangsnøgle i Outline Manager og føje den til Outline-klienten på en anden enhed kan du nemt bruge VPN-forbindelsen på flere enheder. Det er praktisk, når du vil dele en VPN med familiemedlemmer eller et lille team.
Tjek og administrer dataforbrug - Forhindr overforbrug
I Outline Manager kan du tjekke dataforbruget for hver adgangsnøgle.
Dette lader dig se, hvem der bruger hvor meget data, og du kan også indstille datagrænser, hvis det er nødvendigt. Ved at indstille grænser kan du forhindre utilsigtet overforbrug af båndbredde.
Anbefalede indstillinger for at forbedre sikkerheden endnu mere
- VPS-sikkerhedsforanstaltninger: Gennemse firewall-indstillingerne på XServer VPS og luk unødvendige porte. Det er også vigtigt to holde operativsystemet og softwaren fuldt opdateret.
- Strong adgangskoder: Angiv stærke, svære at gætte adgangskoder til VPS-rodkontoen og Outline Manager-adgangsnøglerne.
- Two-factor authentication: Aktivér to-faktor-autentificering for din Xserver-konto og VPS-login, hvor det er muligt.
Opsummering: nyd en sikker og komfortabel VPN-oplevelse med Outline og XServer VPS

Outline VPN giver kraftfuld VPN-funktionalitet, der rækker langt ud over, hvad den enkle grænseflade måske antyder. Fordi Outline Manager håndterer den svære opsætning automatisk, kan selv begyndere opbygge og bruge et VPN-miljø med tillid.
When you combine it with XServer VPS, the flexibility of Outline VPN øges endnu mere. Du kan placere din VPN-server, hvor du vil, og bruge stabil kommunikation med høj hastighed.
Brug denne artikel som din guide, og prøv at bygge dit eget sikre og behagelige internetmiljø med Outline VPN og XServer VPS.